




When deploying the PaperCut Pocket or PaperCut Hive edge node and print client with JumpCloud Device Management, we split the deployment into two parts: first the edge node, and then the print client.
Summary of deploying the client (edge node)
- The computer app is run with elevated privileges, so it doesn’t require the user to be logged in.
- The computer app creates the PaperCut Pocket or PaperCut Hive edge node Windows service, and PaperCut Printer object.
- The edge node can be deployed without a print client. For example, you can install a super node on Windows Server.
- The edge node must be deployed before installing the print client.
Summary of deploying the print client
- The computer app creates the print client processes for print job submission.
- It installs files and processes in the Users Security Context.
- The install runs as “Run as logged on User”.
- After successful execution, it requires the user to perform the linking process via their email invite.
Prerequisites
- You have already rolled out the JumpCloud Agent to your Windows computers.
- Cloud storage is available to host the PaperCut Pocket or PaperCut Hive computer app installer.
Create the JumpCloud commands and install the edge node and print client on users’ computers
You need to create separate JumpCloud commands to deploy the PaperCut Pocket or PaperCut Hive edge node and print client to your users’ computers.
1. Create the command and deploy the PaperCut Hive or PaperCut Pocket edge node
In the PaperCut Hive or Pocket admin console, go to Manage > Edge Mesh and click Add edge nodes.
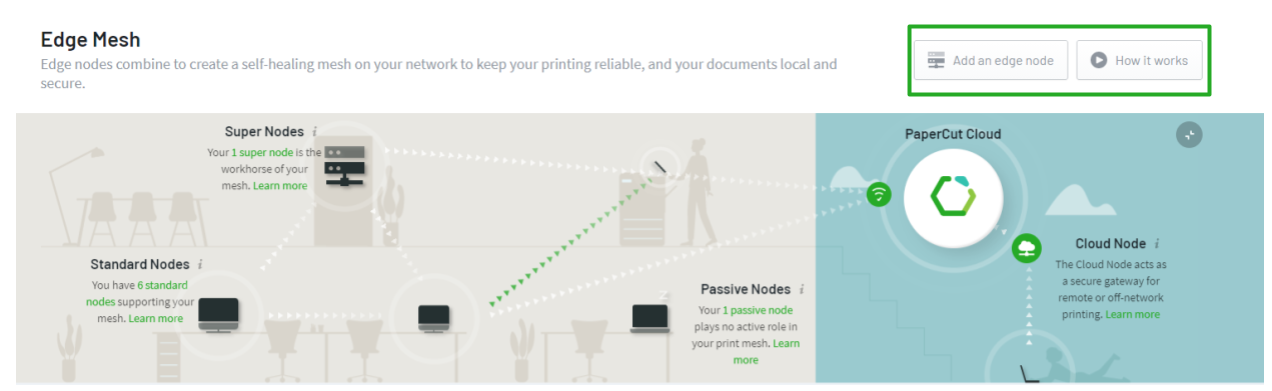
PaperCut Pocket/PaperCut Hive admin interface - Add an edge node
Select Manually deploy edge nodes.
Click Download for Windows to download the PaperCut Pocket or PaperCut Hive computer app (papercut-pocket.exe or papercut-hive.exe). Copy the downloaded file to your preferred cloud storage provider. (In this example we are using DropBox.)
Under Step 2, click the Copy button to copy the command line, and then paste it into a text editor. You'll need the /systemkey value later.
Log in to JumpCloud and under Device Management navigate to Commands.
Add a new Command by clicking on the plus icon and selecting Command.
In the Name field type PaperCut Pocket edge node Install v2.0 or PaperCut Hive edge node Install v2.0
Select Windows for Type and check the Windows Powershell checkbox.
Paste the following script into the Command field.
#JumpCloud Command Script to install PaperCut Hive edge node v2.0 $folder = 'C:\Program files\PaperCut Hive' if (-not (Test-Path -Path $Folder)) { (New-Object System.Net.WebClient).DownloadFile("https://your-cloud-storage-location/papercut-hive.exe", "C:\TEMP\papercut-hive.exe") start-process -FilePath "C:Temp\papercut-hive.exe" -ArgumentList '/VERYSILENT /systemKey="xxxxxxxxxxx"' } else { }Replace the
/systemkeyvalue in the script with the/systemkeyvalue you noted down in Step 4.Edit the DownloadFile URL to the URL of where you have made the papercut-pocket.exe or papercut-hive.exe availale.
For initial testing set the Launch Event to Run Manually. Once fully tested and you are comfortable you can change the Launch Event to run on a scheduled basis.
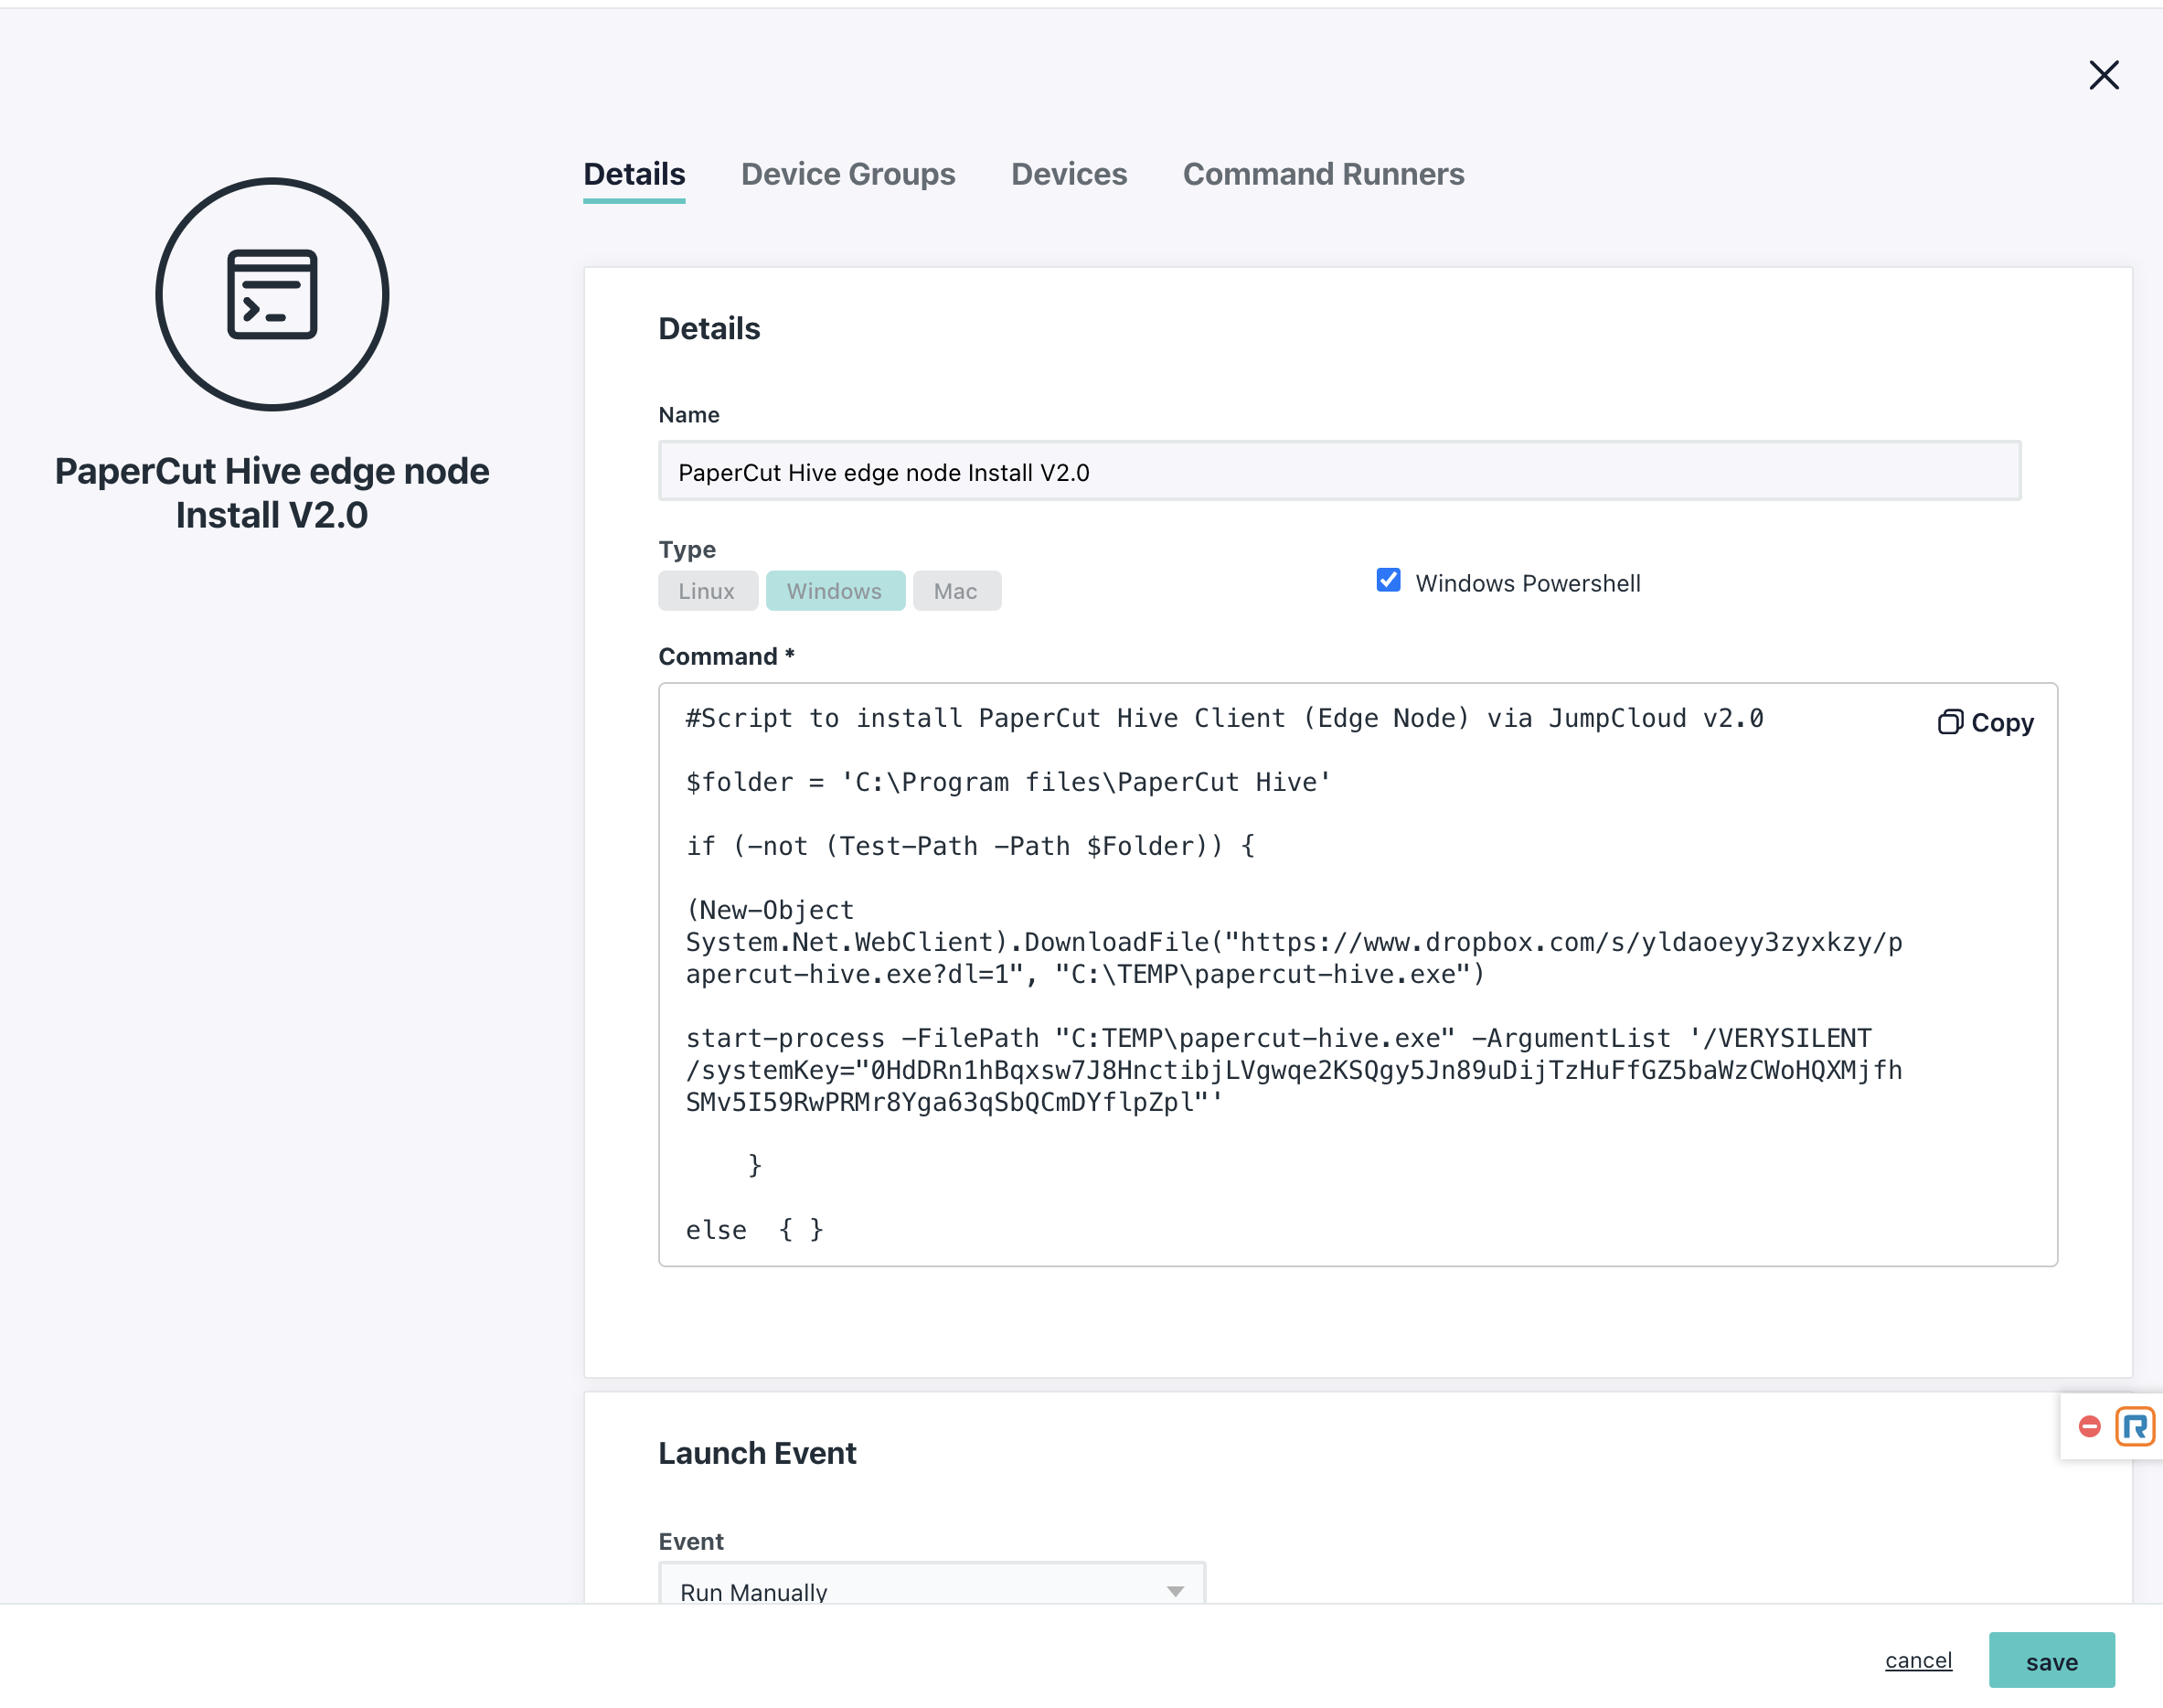
JumpCloud - PaperCut Pocket/PaperCut Hive edge node Command
Click on Devices to select your test computer that you wish to deploy PaperCut Hive edge node to. Best practice is to test the deployment to a test computer end to end before pushing out to a greater number of computers.
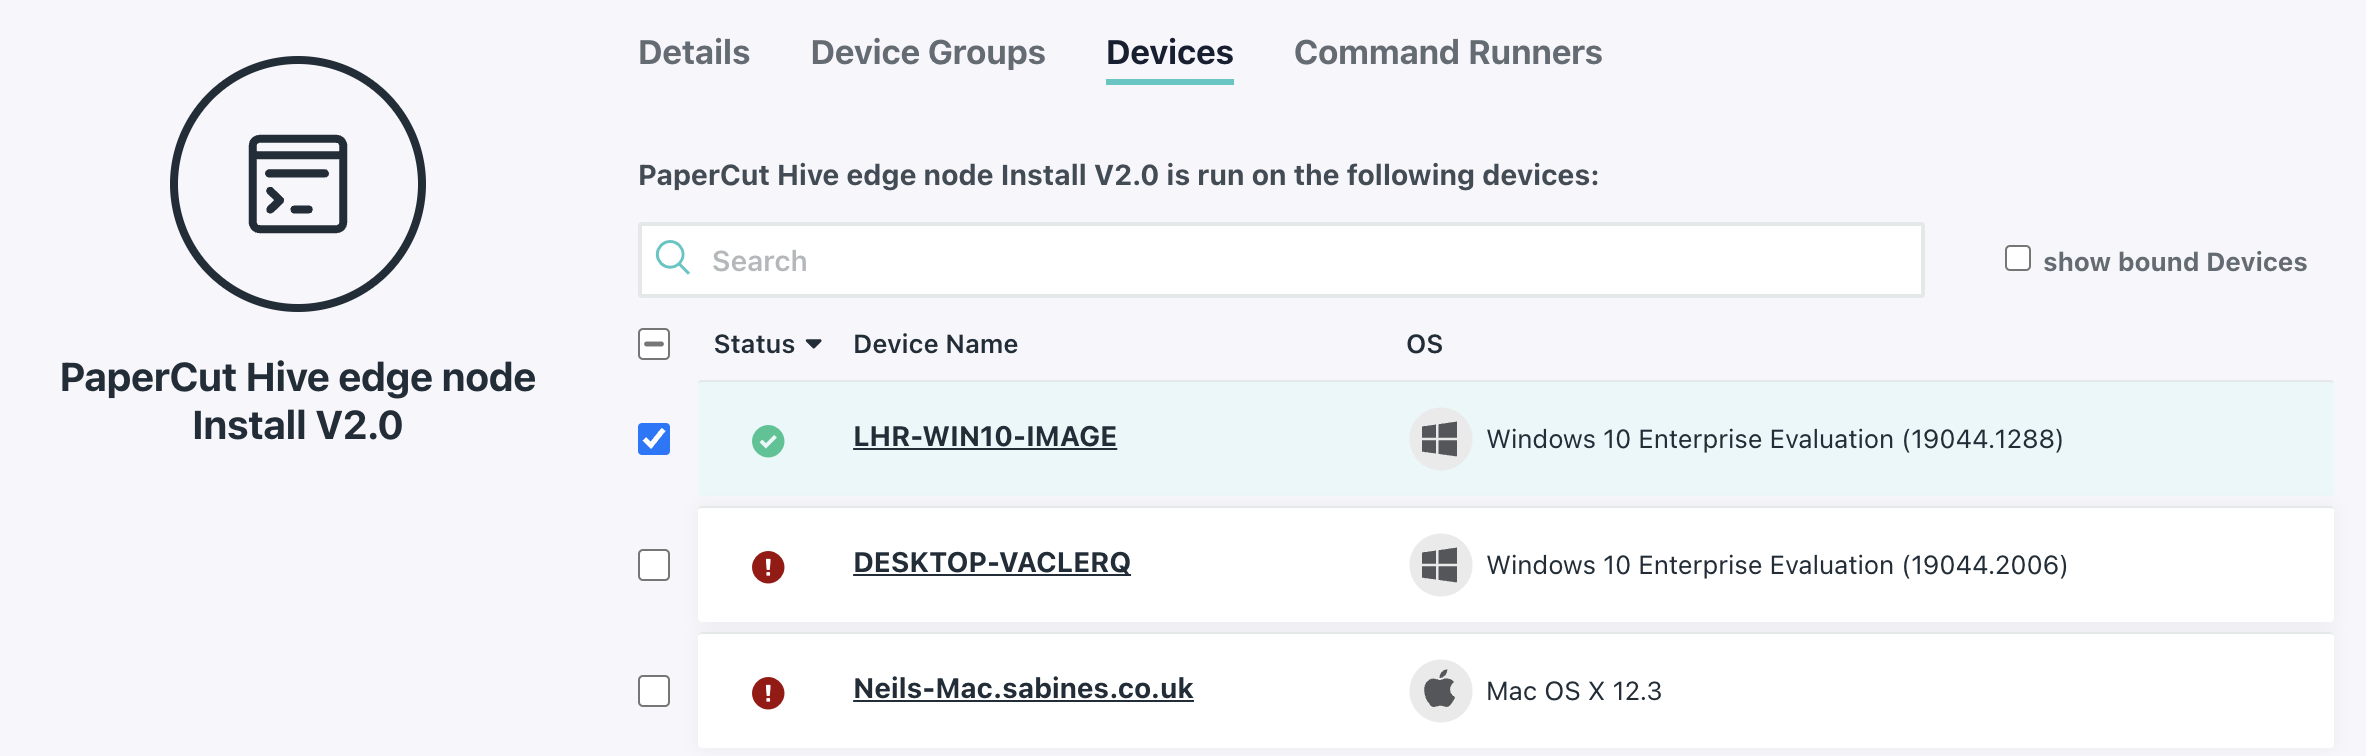
JumpCloud - PaperCut Pocket/PaperCut Hive edge node Command
Click Save to save the Command.
Locate the PaperCut Pocket edge node Install v2.0 or PaperCut Hive edge node Install v2.0 Command from the list on the Commands page you are now on, and click the Run Now button for this command to execute it.
The PaperCut Pocket or PaperCut Hive edge node is then deployed to your test computer(s).
2. Create the command and deploy PaperCut Hive or PaperCut Pocket print client
For the PaperCut Pocket or PaperCut Hive print client, you need to copy the installation command syntax from the InTune Add-on instructions. This contains the /userkey switch that signals the papercut-pocket.exe or papercut-hive.exe to create the user directories and processes.
From the PaperCut Pocket or PaperCut Hive Admin console, under Manage select Add-ons > All Add-ons > Desktop App Deployment with Microsoft Intune.
Click Learn More. Click Add to enable this add-on for your organization. The Review authorizations popup is displayed.

Select the I agree that: check box and click Agree.
Select these instructions to open the instructions.
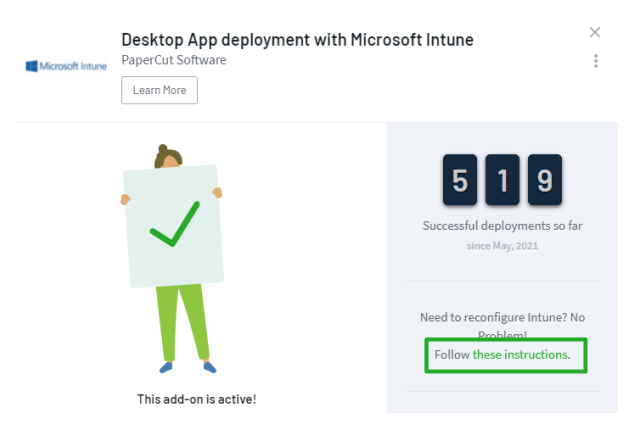
PaperCut Pocket/PaperCut Hive - InTune Add-on
Select View set up process and scroll down to Install the user component.
Go to step 7, copy the Install command string, and paste it into a text editor.

PaperCut Pocket/PaperCut Hive - print client /userkey
Go to JumpCloud, log in again, and under Device Management navigate to Commands.
Add a new command by clicking on the + icon and selecting Command.
In the Name field, type PaperCut Pocket print client Install V2.0 or PaperCut Hive print client Install V2.0.
Select Windows for Type and check the Windows Powershell checkbox.
Paste the following script in to the Command field ensuring that you replace:
/userkeyvalue with the/userkeyvalue from the install command you saved in Step 5./regionvalue with the/regionvalue from the install command you saved in Step 5. (If there is no region value then you can ignore this step)./orgIdvalue with the/orgIdvalue from the install command you saved in Step 5.#JumpCloud Command Script to install PaperCut Hive print client v2.0 $folder = '%localappdata%\Programs\PaperCut Hive' if (-not (Test-Path -Path $Folder)) { # If PSModule RunAsUser is not installed, install it if ( -not (get-installedModule "RunAsUser" -ErrorAction SilentlyContinue)) { Install-PackageProvider -Name NuGet -MinimumVersion 2.8.5.201 -Force install-module RunAsUser -force } $Command = { C:\Temp\papercut-hive.exe /VERYSILENT /CURRENTUSER /userkey="xxxxxxxxxxx" /region="yy"/orgId="zzzzzzzz" } invoke-ascurrentuser -scriptblock $Command }For initial testing set the Launch Event to Run Manually you can change this to be scheduled later once you have finished your testing.
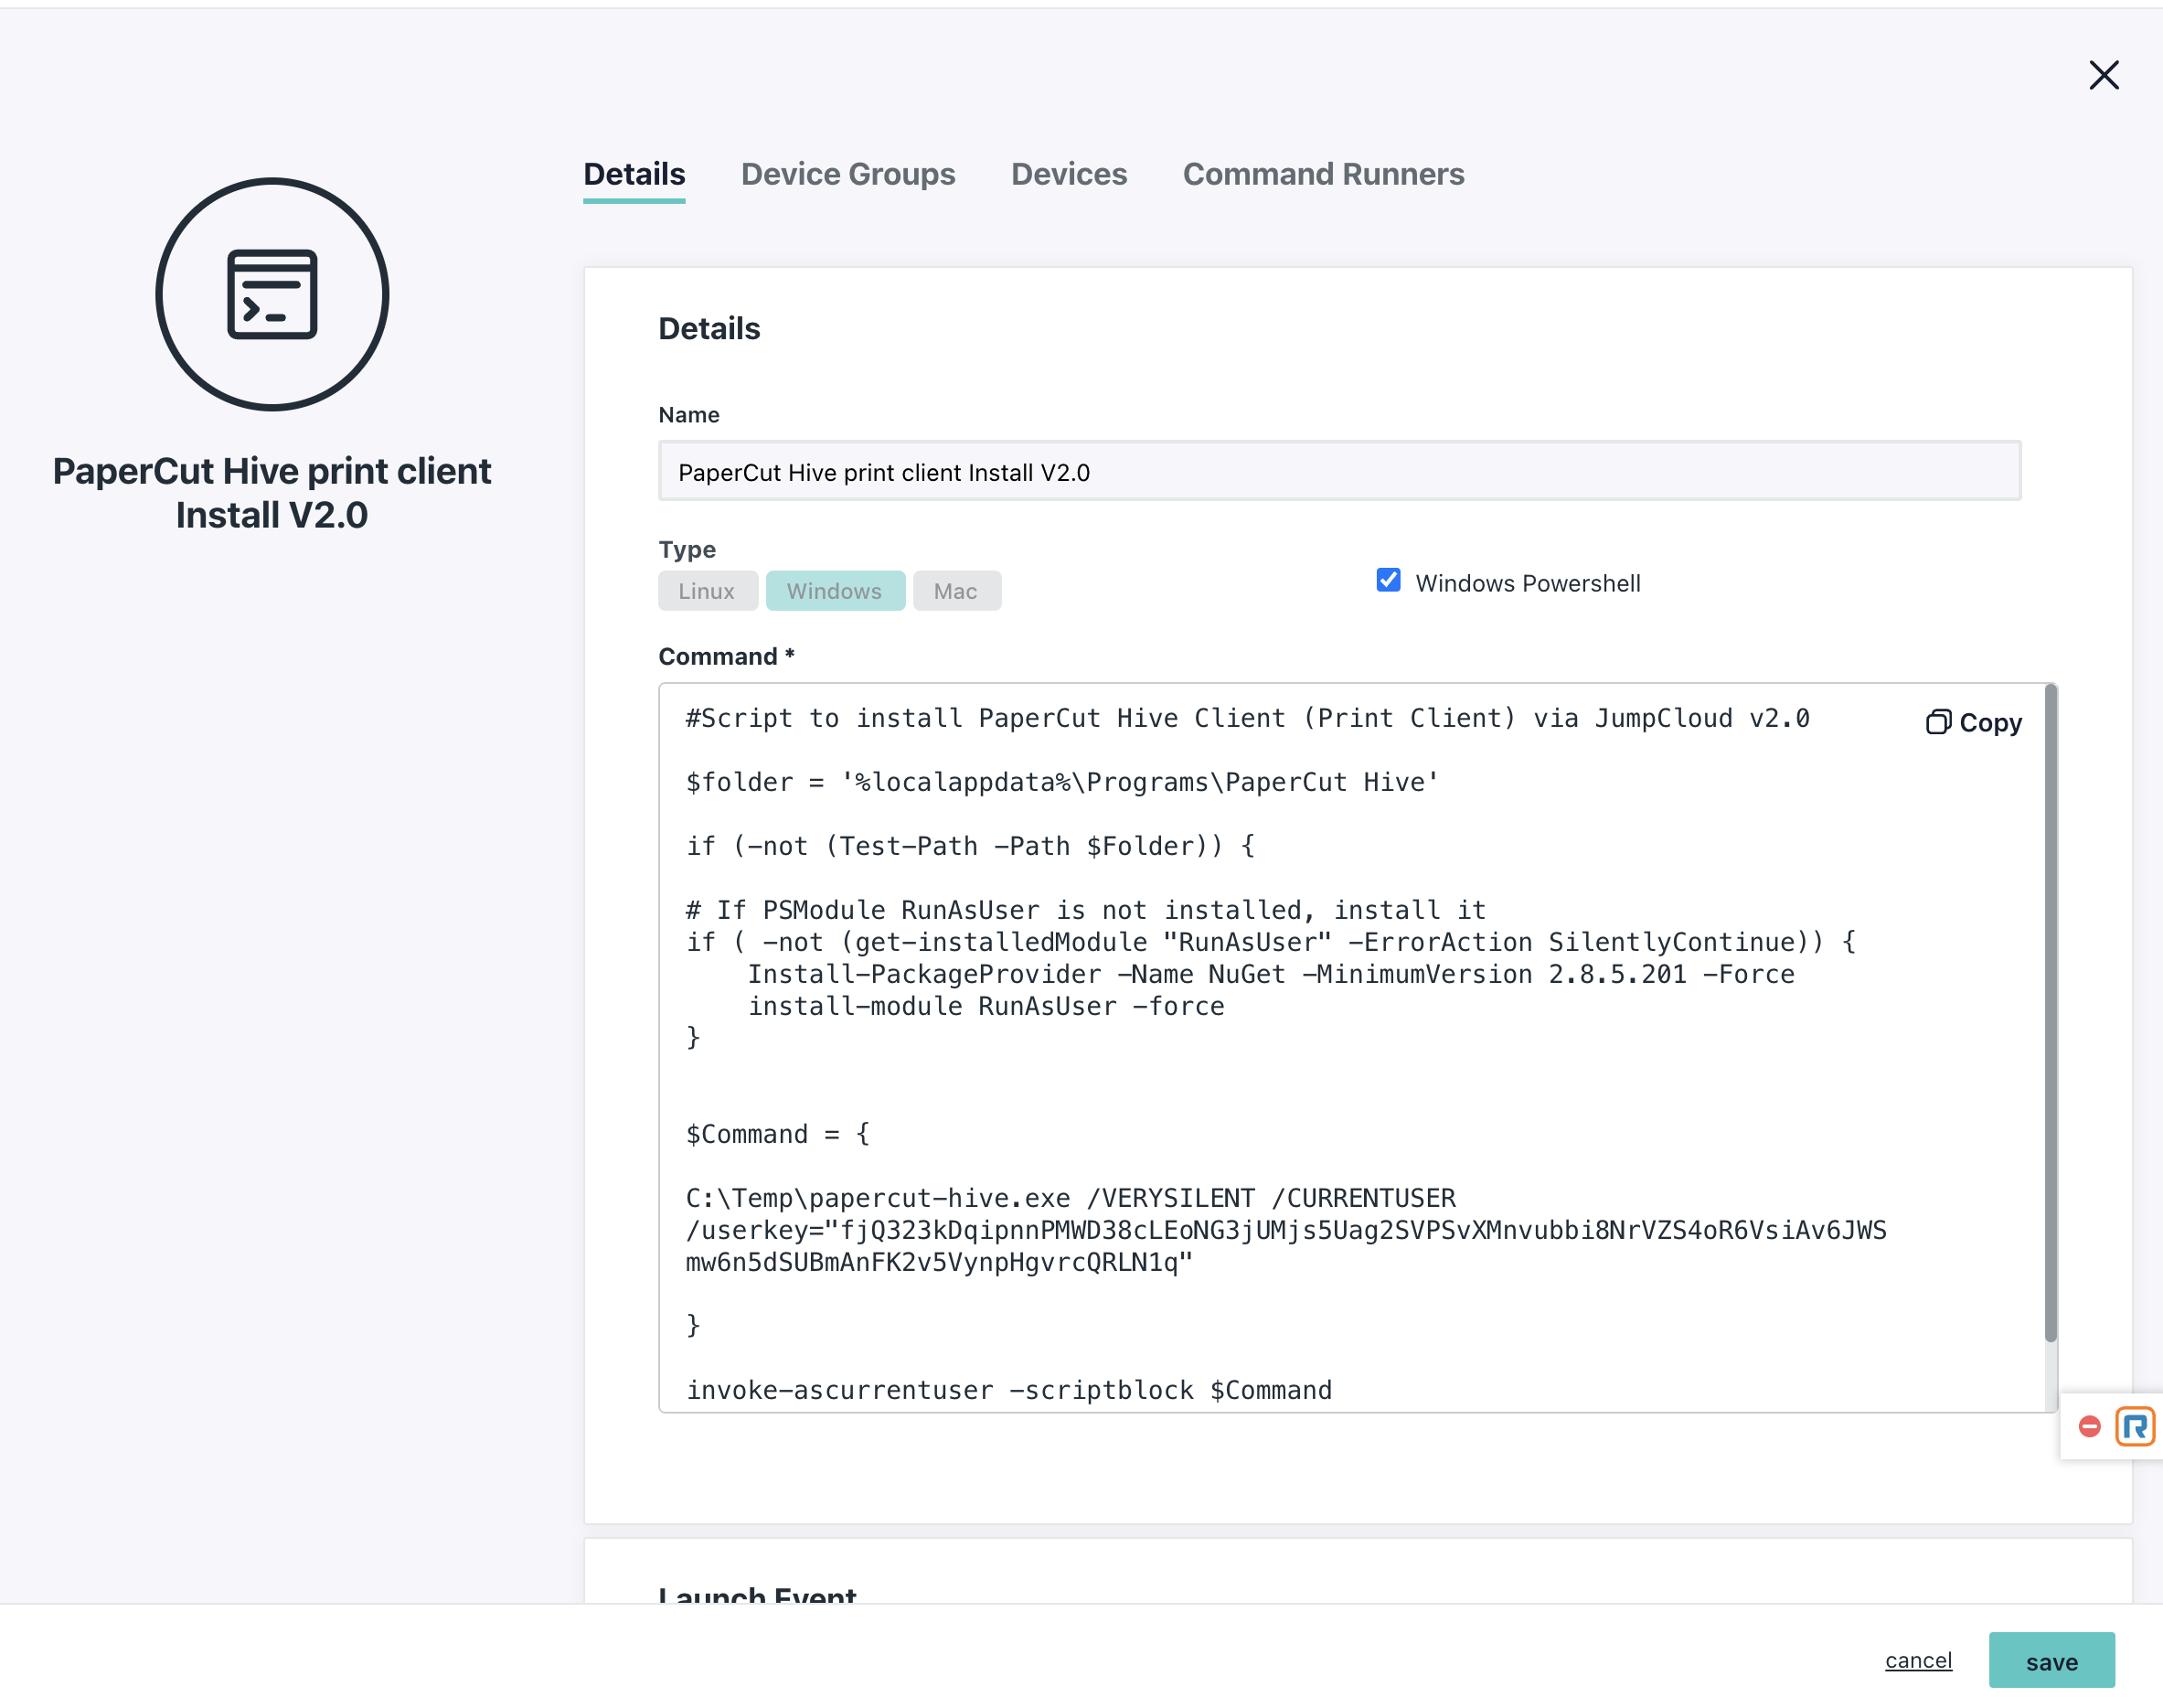
JumpCloud - PaperCut Pocket/PaperCut Hive print client Command
Click on Devices to select your test workstation that you wish to deploy the PaperCut Hive print client. Best practice is to test the deployment to a test computer end to end before pushing out to a greater number of computers.
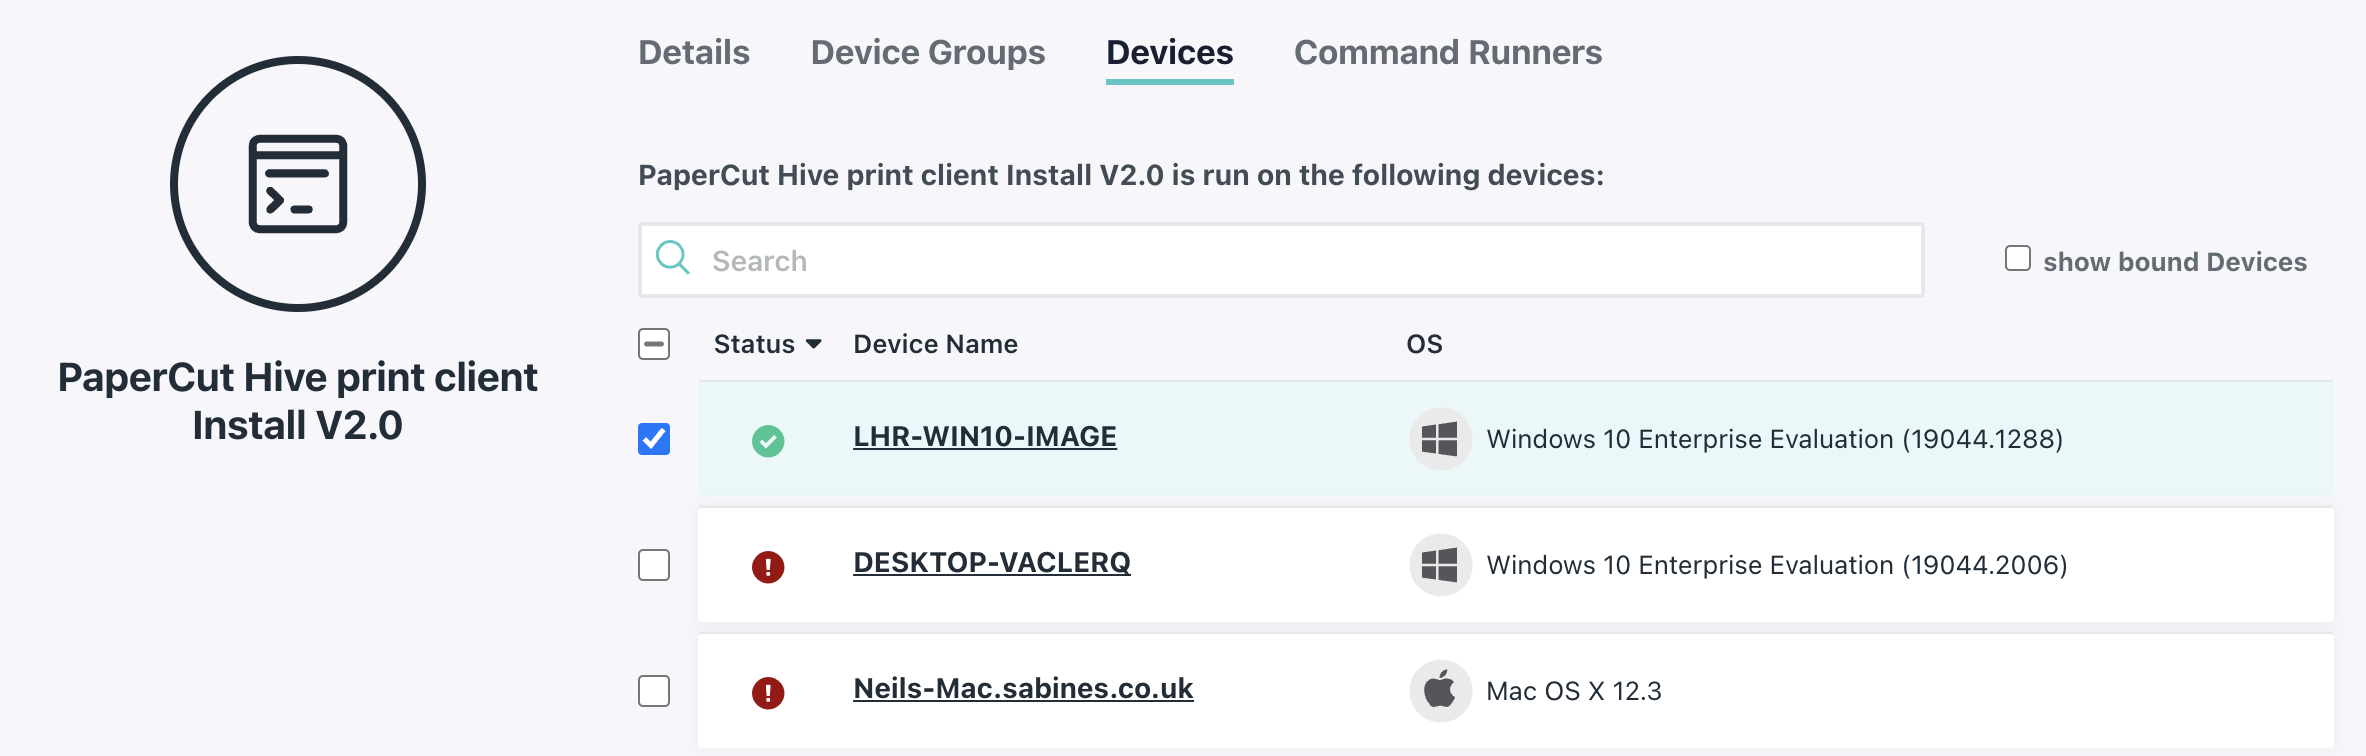
JumpCloud - PaperCut/PaperCut Hive print client Command
Click on the Save button to save the command.
Locate the PaperCut Pocket print client Install V2.0 or PaperCut Hive print client Install V2.0 Command from the list on the Commands page you are now on, and click on the Run Now button for this command to execute it.
The PaperCut Pocket or PaperCut Hive print client is then deployed to your test computer(s).
Post-deployment checks
After both components are deployed, spot-check your test computer to ensure the following:
- In Task Manager, check the
pc-edgenode-serviceis running.
The Windows PC requires this service to perform Edge Mesh activities such as receiving, replicating, or printing jobs if the PaperCut Cloud Service calls upon it. - In Task Manager, check that
pc-print-client-service.exeis running.
This is the print client needed to link the end-user to PaperCut Pocket or PaperCut Hive and submit jobs via the PaperCut Printer. This process must be running in memory. It provides the functions the user needs to print jobs via the PaperCut Printer.
If either of these are not running, contact your PaperCut Reseller and provide copies of the logs.
Locations of logs
- Edge node service and setup logs:
C:\Program Files\PaperCut Hive\data\logsorC:\Program Files\PaperCut Pocket\data\logs - User print client logs:
%AppData%\Local\Programs\PaperCut Hive\data\logsor%AppData%\Local\Programs\PaperCut Pocket\data\logs - User client set up logs:
%AppData%\Local\Programs\PaperCut Hive\data\logsor%AppData%\Local\Programs\PaperCut Pocket\data\logs%AppData%\Local\Temp
How to uninstall the PaperCut Hive or Pocket client software from Windows clients
These steps explain how to completely remove the PaperCut Hive or Pocket components from a Windows device.
To prevent devices from running the installation command again, either remove the command in JumpCloud or remove device access to the command. The first step is to remove the installation command from the Windows clients. The second step is to create and deploy the uninstall command to remove the Edge Node. The third step is to create and deploy the uninstall command to remove the Print Client.
1. Remove the command in JumpCloud or remove device access to the command from the Windows clients
Remove the command
Use this method if you no longer need the install command in your JumpCloud environment.
Log in to JumpCloud, and in the left navigation panel, select Device Management > Commands.
Select the PaperCut Hive edge node and print client Install V2.0 or PaperCut Pocket edge node and print client Install V2.0 in the list.
Under the Actions column for the command, select the three dots.
Select Delete command. The command will no longer display in the JumpCloud interface.
Remove access to the command
Use this method to keep the install command but prevent specific devices from accessing it.
Log in to JumpCloud, and in the left navigation panel, select Device Management > Commands.
Select the PaperCut Hive edge node and print client Install V2.0 or PaperCut Hive edge node and print client Install V2.0 command.
Go to the Devices tab.
Clear the checkboxes for the devices you want to remove.
Select Save. The command will no longer run.
2. Create and deploy the uninstall command for the Edge Node
After removing the command or access to it, you need to create and run a new command to uninstall PaperCut Hive or Pocket Edge Node from the end-user computers.
Log in to JumpCloud, and in the left navigation panel, select Device Management > Commands.
Select the + icon, then select Command.
In the Name field, type either
PaperCut Pocket edge node uninstall - windowsorPaperCut Hive edge node uninstall - windows.Select Windows for Type and check the Windows Powershell checkbox.
Copy the PaperCut Hive or Pocket script below and paste into the Command field:
PaperCut Hive Edge Node uninstall script:
#JumpCloud Command Script to uninstall PaperCut Hive edge node

$folder = 'C:\Program Files\PaperCut Hive'
$uninstaller = "$folder\unins000.exe"

if (Test-Path -Path $uninstaller) {

    Start-Process -FilePath $uninstaller -ArgumentList '/VERYSILENT' -Wait -NoNewWindow

} else { }
PaperCut Pocket Edge Node uninstall script:
#JumpCloud Command Script to uninstall PaperCut Pocket edge node

$folder = 'C:\Program Files\PaperCut Pocket'
$uninstaller = "$folder\unins000.exe"

if (Test-Path -Path $uninstaller) {

    Start-Process -FilePath $uninstaller -ArgumentList '/VERYSILENT' -Wait -NoNewWindow

} else { }
For initial testing, set the Event to Run Manually.
Select the Devices tab and select a device you want the PaperCut Hive or Pocket client removed. As a best practice, test the command on one machine first before uninstalling the software from a greater number of devices.
Select Save to save the command.
From the list of commands, locate your newly created uninstall command and select Run Now to execute it. To make sure it has completed the task, to go the Results tab in JumpCloud. You'll see it at the top of the list, click View Details to see the result.
3. Create and deploy the uninstall command for the Print Client
After removing the command or access to it, you need to create and run a new command to uninstall PaperCut Hive or Pocket Print Client from the end-user computers.
Log in to JumpCloud, and in the left navigation panel, select Device Management > Commands.
Select the + icon, then select Command.
In the Name field, type either
PaperCut Pocket print client uninstall - windowsorPaperCut Hive print client uninstall - windows.Select Windows for Type and check the Windows Powershell checkbox.
Copy the PaperCut Hive or Pocket script below and paste into the Command field:
PaperCut Hive Print Client uninstall script:
#JumpCloud Command Script to uninstall PaperCut Hive print client

# If PSModule RunAsUser is not installed, install it so we can run as the logged-in user
if ( -not (Get-InstalledModule "RunAsUser" -ErrorAction SilentlyContinue)) {
    Install-PackageProvider -Name NuGet -MinimumVersion 2.8.5.201 -Force
    Install-Module RunAsUser -Force
}

$Command = {
    # Define the path to the uninstaller in the current user's AppData folder
    $uninstaller = "$env:LOCALAPPDATA\Programs\PaperCut Hive\unins000.exe"

    # Check if the uninstaller exists, and if so, run it silently
    if (Test-Path -Path $uninstaller) {
        Start-Process -FilePath $uninstaller -ArgumentList '/VERYSILENT' -Wait -NoNewWindow
    }
}

# Execute the uninstallation block as the logged-in user
Invoke-AsCurrentUser -ScriptBlock $Command
PaperCut Pocket Print Client uninstall script:
#JumpCloud Command Script to uninstall PaperCut Pocket print client

# If PSModule RunAsUser is not installed, install it so we can run as the logged-in user
if ( -not (Get-InstalledModule "RunAsUser" -ErrorAction SilentlyContinue)) {
    Install-PackageProvider -Name NuGet -MinimumVersion 2.8.5.201 -Force
    Install-Module RunAsUser -Force
}

$Command = {
    # Define the path to the uninstaller in the current user's AppData folder
    $uninstaller = "$env:LOCALAPPDATA\Programs\PaperCut Pocket\unins000.exe"

    # Check if the uninstaller exists, and if so, run it silently
    if (Test-Path -Path $uninstaller) {
        Start-Process -FilePath $uninstaller -ArgumentList '/VERYSILENT' -Wait -NoNewWindow
    }
}

# Execute the uninstallation block as the logged-in user
Invoke-AsCurrentUser -ScriptBlock $Command
For initial testing, set the Event to Run Manually.
Select the Devices tab and select a device you want the PaperCut Hive or Pocket client removed. As a best practice, test the command on one machine first before uninstalling the software from a greater number of devices.
Select Save to save the command.
From the list of commands, locate your newly created uninstall command and select Run Now to execute it. To make sure it has completed the task, to go the Results tab in JumpCloud. You'll see it at the top of the list, click View Details to see the result.
Comments
Comments are not available in this preview environment. On papercut.com, this space shows the live Disqus comment thread for this page.