
One of the most common issues reported by users is sending a print job to the PaperCut Printer only to find an empty queue in their mobile app or at the embedded device. From the user’s perspective, the PaperCut Pocket or Hive mobile app remains stuck on “Looking for print jobs…” or the printer’s embedded screen displays “Ready when you are.”

This article is designed for administrators to diagnose why a job might fail to reach the release queue.
If the print job doesn’t appear in the release queue, it likely hasn’t reached the cloud from the user’s workstation, so in many cases the job won’t appear in the Job Log or generate a Job Trace. This means most of the troubleshooting will involve looking at the the client end of things.
Make sure the Print Client is running
A print job cannot be submitted if the Print Client Service is not running. When this happens on macOS you may see the message “Printing - The Printer is not responding” or the print job may fail silently.
On Windows, some third-party tools boast about increasing startup speeds by disabling unnecessary startup tasks might disable necessary PaperCut Hive and Pocket services. Ensure the service is running and configured to start automatically on boot.
Windows
- Open Task Manager.
- On the Details tab confirm that pc-print-client-service.exe is running.
- If the service is not running, go to
C:\Users\%username%\AppData\Local\Programs\PaperCut Hive\ - Double-click pc-print-client-service.exe to start it manually.
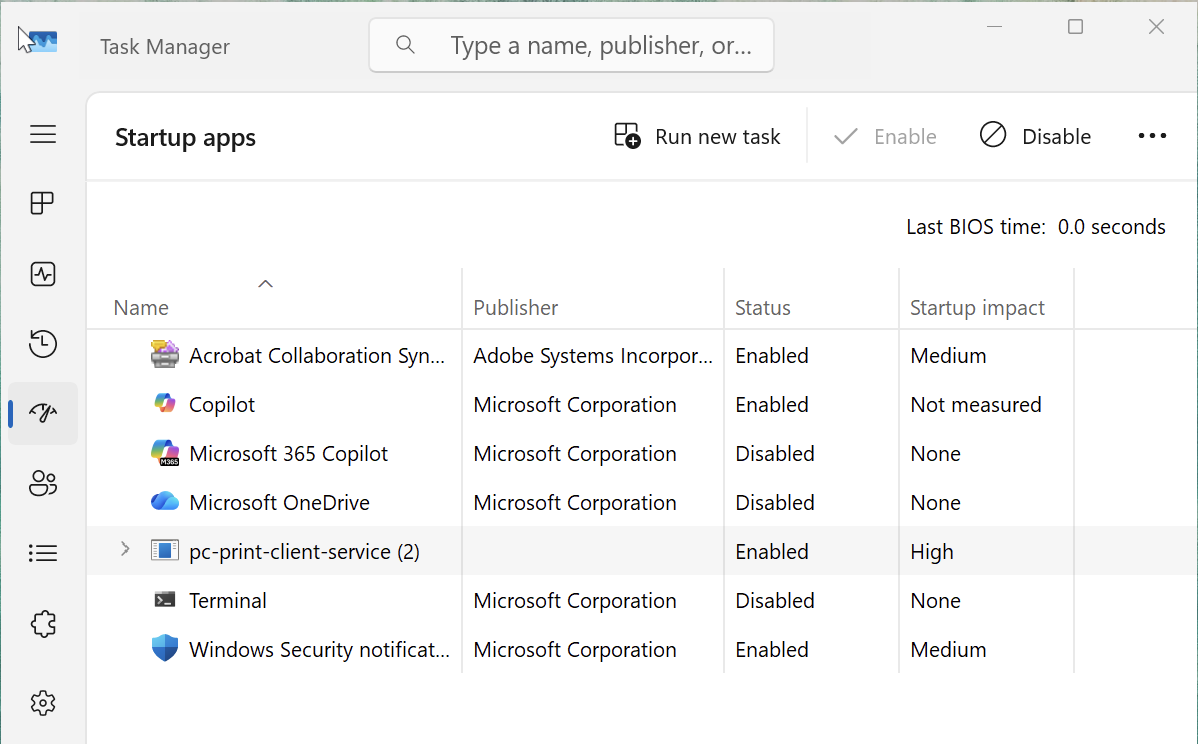
- Next, open Task Manager and open the Startup tab.
- Make sure that pc-print-client-service is set to Enabled.
macOS
- In the Applications folder, go to Utilities and select Activity Monitor.
- Search for
pc-print-clientandpc-print-client-service. - Confirm both services are currently running. If not, try reinstalling the client.
Verify the logged-in user
Print jobs might not appear for release if the user is signed in to the Print Client with the wrong account. This occurs if:
- a user selects a “Get Started” link intended for another person.
- a user is deleted and re-added to PaperCut Hive, for example, through an Entra ID sync. The client keeps the old internal user ID, causing jobs to be rejected.
- a user’s email address or UPN changes, which usually happens after a user marries or changes their name. PaperCut Hive treats the updated email as a new user, but the client remains linked to the old identity.
In the PaperCut Hive Activity log, you might see the message: “Printing from [email address] was rejected. The job was denied because this account is not enabled.”
The steps to resolve are differ whether you have a desktop client (Windows and macOS) or the Chrome extension. Expand the accordion below to see steps for your operating system.
Check the account in macOS and Windows clients
Before you start, ensure you have the user's correct email address as it appears in the PaperCut Hive admin console.
Use the taskbar icon to check the user identity
In the Windows taskbar or macOS menu bar, select the PaperCut icon.
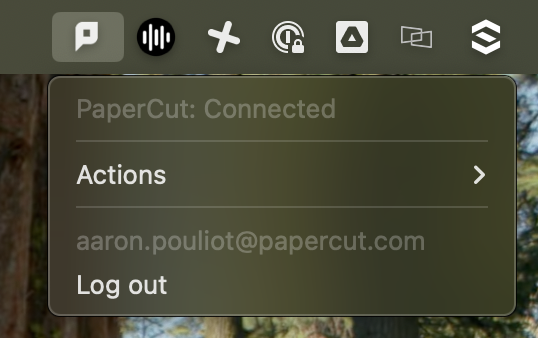
Verify the email address matches the user's current account.
If the email address is correct but jobs are still missing, select Log out.
Try to print something and follow the prompts to re-authenticate. This ensures the client uses the most recent internal user ID.
Manually reset the user identity (legacy)
If logging out does not resolve the issue, you can manually reset the user identity with the old method of deleting the identity file.
Navigate to the
userclient.identfile location:Windows:
%localappdata%\Programs\PaperCut Hive\data\config\userclient.identmacOS:
~/Library/PaperCut Hive/data/config/userclient.ident
Delete the
userclient.identfile.(Optional) Send a new classic invitation to the user and ask the user to open it in Chrome, Edge, or Firefox user from the PaperCut Hive admin console. Don't use Safari on macOS as this may not link properly.
Ask the user to select Get Started in the invitation email to reinstall the PaperCut Hive and Pocket client. A new identity file is generated.
Send a print job and follow the prompts to re-authenticate. The client now uses the most recent internal user ID.
Manually reset the user identity for Chrome
If a user's email address or User Principal Name (UPN) changes, PaperCut Hive treats them as a new user. The Chrome extension remains linked to the old user ID, causing print jobs to be silently rejected. To resolve this, clear the extension's stored data to relink the account.
Clearing extension storage
In the Chrome browser address bar, type
chrome://extensions.Turn on Developer mode using the toggle in the top-right corner.
Find the PaperCut Hive extension and select Service worker (located under Inspect views). The DevTools window opens.
Select the Application tab.
In the left navigation pane under Extension Storage, right-click and select Clear for the following:
Session
Local
Sync

Close the DevTools window and the Chrome browser.
Reopen Chrome.
Send a new invitation to the user from the PaperCut Hive admin console.
Ask the user to select Get Started in the invitation email and follow the steps to link the device.
Send a test print job to confirm the fix. The job now appears in the release queue.
Remove conflicting PaperCut NG/MF clients
If a workstation has the PaperCut Print Deploy Client (or Direct Print Monitor) installed from PaperCut NG/MF, a conflict might occur. These applications use the Print Provider component required by PaperCut Hive and Pocket. If both are installed on the same machine, the components conflict and only one Print Provider can run correctly. This conflict might cause print jobs to fail or the print queue to pause.
This situation is common when an organization migrates from PaperCut MF to PaperCut Hive and the PaperCut Print Deploy Client remains on workstations.
Check for the Print Deploy Client
- See whether the PaperCut Print Deploy Client is installed based on your operating system:
- Windows: Go to Control Panel > Programs and Features and look for PaperCut Print Deploy Client in the list of installed programs.
- macOS: Check the Applications folder for a folder named PaperCut Print Deploy Client.
- Uninstall the PaperCut Print Deploy Client using the original installation method. See: Print Deploy FAQs for full uninstall instructions.
- Restart the affected computer.
- The PaperCut Hive or Pocket client should now ready to manage print jobs. Submit a test print job to confirm.
This issue can also be confirmed through log pc-edgenode-service.log because the Hive or Pocket client will record that it was unable to find the print-provider.conf file: 2025/11/20 14:45:34 pc-event-monitor: STDERR|PaperCut: Unable to find print provider config file 2025/11/20 14:45:34 pc-event-monitor: STDERR|PaperCut: Unable to find the config file: print-provider.conf. 2025/11/20 14:45:34 pc-event-monitor: Service stopped with exit code 10
Windows - disable “Turn off printing over HTTP”
The Windows Turn off printing over HTTP policy can prevent printing through the PaperCut printer if it is enabled. This policy may be managed using Group Policy or Intune.
To ensure printing works correctly, set this policy to Disabled.
For detailed steps and screenshots, refer to “Test Page failed to print” error with Mobility Print and PaperCut Pocket/Hive.
Windows - Print queue in error
Some users report that print jobs stay stuck on their workstations instead of appearing for release in the mobile app or at a printer. The print job remains in the Windows print queue with a status of “Printing, Error”.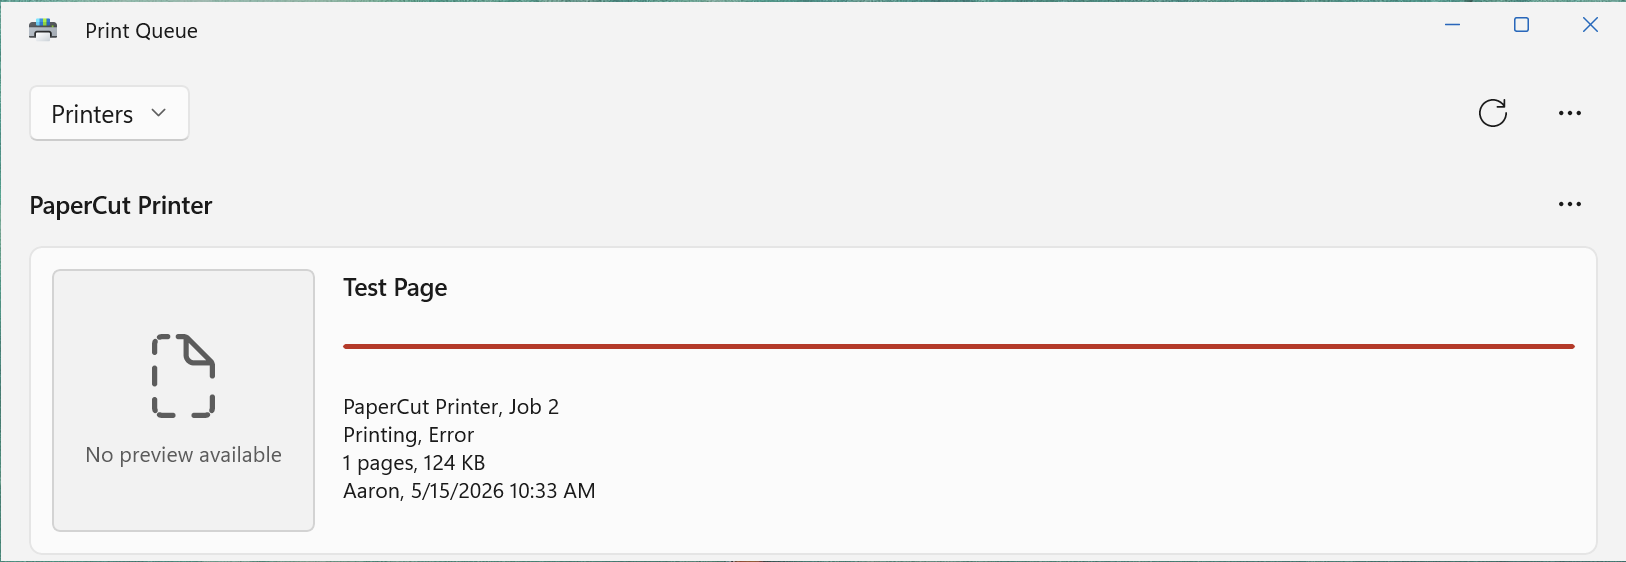
In some cases, antivirus or firewall software interferes with the IPP port used by PaperCut Hive. When this happens, the port might be removed automatically, and the PaperCut printer may fall back to the default LPT1 port, which does not work.
Verify that the PaperCut printer is still configured to use an IPP connection.
Checking the printer port
- Open Printers & scanners in Windows settings.
- Right-click the PaperCut Printer and select Printer properties.
- Select the Ports tab. The port should show an IPP connection like
http://localhost:9265/printers/papercutpocket.
To re-add the port, uninstall and reinstall the PaperCut Hive and Pocket client software. Finally, ensure your antivirus software is not blocking IPP printing or affecting printer ports.
Chrome - Check print preview settings
When attempting to print a page using the PaperCut Hive/Pocket Chromebook extension, after clicking Print this page, users might experience a spinning loading bar and not be able to choose a destination print.
This is usually resolved by doing the following:
-
Go to the Google Admin portal and click Devices.
-
On the left, click Chrome then settings > Users & Browsers. There is a setting under there for print preview.
-
In the Google Chrome settings for Print preview default, make sure Use default print behavior is selected.
Print jobs are canceled after 15 minutes
In some cases, a print job never appears on the release screen and is automatically canceled after 15 minutes. This issue occurs when third-party Data Loss Prevention (DLP) software, for example, Senso, interrupts the print job.
For more information, refer to Senso Troubleshooting.
Test cloud access
Make sure that your PaperCut Pocket and Hive clients are able to communicate with PaperCut’s services in the Cloud. Use the following PowerShell command to test connectivity from the affected workstation:
test-netconnection mqtt2.notifications.cloud.papercut.com -port 443
The client uses the MQTT protocol to report and intelligently route print jobs to printers. For full details on required cloud endpoint connectivity, see the system requirements.
Test network connectivity between nodes
Verify that the different nodes on your network can communicate with each other. Try to see if you can access the status page for a few of the edge nodes in your network. Prioritize this check against any Super Nodes that you may have in the environment.
To access the status page, open a web browser on a computer on the network, and open: https://[other-node-ip]:9264/status - where [other-node-ip] is the IP address of another node that should be online and accessible from the computer that you’re testing on.
If this succeeds, you should see a JSON-formatted page with some information about your Edge Mesh — including some version numbers and Organization ID. To be extra confident in this test, repeat it with a few different pairs of edge nodes on your network.
If that doesn’t work, check the Firewall ports and networking section to make sure that all the required ports are open to let the different nodes communicate with each other.
Further troubleshooting
The next step is to collect log files from the affected user’s workstation to share with your PaperCut support contact.
These logs can help us diagnose the problem:
- Edge Node Logs — These logs provide important context and show if there’s any kind of connectivity issue between the users’ computer and PaperCut Hive. For steps see: Edge Node Logs.
- PaperCut Printer Client Logs — These logs show what happens after the user clicks “Print” and the job is processed on their local computer. For steps see: PaperCut Printer Client Logs.
With logs in hand, reach out to us through the PaperCut Support Portal. We’ll put you in contact with your authorized PaperCut partner or look into the issue ourselves.
Comments