
PaperCut Mf - SSL Certificates - Windows
THE PAGE APPLIES TO:
Last updated February 20, 2026
Keeping your server secure is a top priority, and a valid SSL certificate is a key part of that. In this guide we will walk you through renewing and installing your SSL certificate in PaperCut MF. We’ll cover two common scenarios:
- You have the private key and certificate files (.crt, .key)
- You have a PFX file (.pfx)
“I have the private key and certificate files (.crt, .key)”
If you have the private key (.key), a server certificate (.crt), and an intermediate bundle from your Certificate Authority (CA). You can use a free tool called OpenSSL to bundle these into a single .pfx file that PaperCut loves to use.
What you’ll need
- OpenSSL for Windows. You can download it from here:
https://slproweb.com/products/Win32OpenSSL.html- The light version (e.g. Win64 OpenSSL v3.6.0 Light) is sufficient for this task and is over 200mb smaller than the full version.
- Download and Install using the EXE or MSI if OpenSSL is not already installed.
- Your private key file (for example, private.key).
- Your signed server certificate file (for example, server.crt).
- Your CA’s intermediate bundle file (for example, ca-bundle.crt).
Step 1. Create a PFX file
A PFX file is a password-protected archive that holds your entire certificate chain. It neatly packages the private key, server certificate, and intermediate certificates into one file, making it super simple to import into PaperCut NG/MF.
-
Create a folder on your C: drive named CertRenew.
-
Place your private.key,
server.crt, andca-bundle.crtfiles inside the C:\CertRenew\ folder. -
Open Command Prompt as an Administrator.
-
Change directory to:
cd C:\CertRenew -
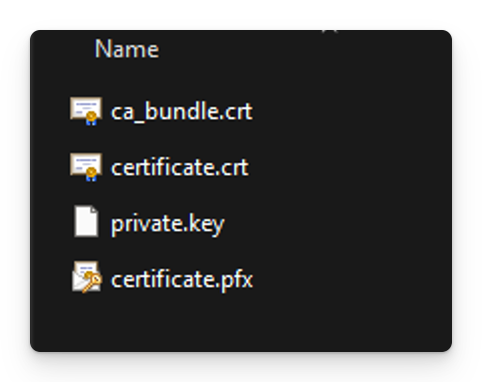
Run the command below to combine your files into a
certificate.pfxfile. Remember to use the actual filenames provided by your CA."C:\Program Files\OpenSSL-Win64\bin\openssl.exe" pkcs12 -export -out certificate.pfx -inkey private.key -in certificate.crt -certfile ca_bundle.crt -
You’ll be prompted to create and verify an Export Password.

7. Choose a strong password and remember it! You’ll need it again soon.
You should now see a brand new certificate.pfx file in your folder, ready for PaperCut NG/MF.
Step 2. Import the PFX into PaperCut MF
PaperCut uses a Java utility called keytool to import your PFX file. This process involves creating a Java keystore from your PFX file and then telling PaperCut where to find it.
-
Import the PFX into a Java Keystore
- Open Command Prompt as an Administrator and navigate to the JRE bin directory.
-
cd "C:\Program Files\PaperCut MF\runtime\jre\bin" -
Run the import command below. This creates a new PFX file that PaperCut NG/MF can use.
keytool -importkeystore -srckeystore "C:\\CertRenew\\certificate.pfx" -srcstoretype pkcs12 -destkeystore "C:\\Program Files\\PaperCut MF\\server\\custom\\my-ssl-keystore" -deststoretype JKSYou will be prompted for two passwords:
Destination keystore password: Create a new password for this keystore file.
Source keystore password: Enter the password you created for your certificate.pfx file. -
Copy your newly created
certificate.pfxfile to the PaperCut MF custom directory:C:\Program Files\PaperCut MF\server\custom\ -
Configure PaperCut NG/MF to use the new keystore
- Open the following file in a text editor like Notepad. Be sure to run it as an Administrator.
C:\Program Files\PaperCut MF\server\server.properties - Look for the SSL settings, which start with server.ssl.
- Uncomment the lines by removing the # and set the values to look exactly like this:
server.ssl.keystore=custom/my-ssl-keystoreserver.ssl.keystore-password: Use the new password you created for the destination keystore.server.ssl.key-password: Use the original password from your certificate.pfx file.
- Open the following file in a text editor like Notepad. Be sure to run it as an Administrator.
-
Restart and verify.
For the changes to take effect, you just need to restart the PaperCut Application Server service.- Restart the PaperCut Application Server .
- Verify the new certificate is working by opening your PaperCut admin console, for example,
https://papercut.yourdomain.com:9192/admin. - Click the padlock icon in your browser’s address bar to check the certificate details and confirm the new expiry date.
Category: How-to Articles
Subcategory: Administration
Comments