
Contents
Changing User and Admin Email Domains in PaperCut Hive or Pocket
THE PAGE APPLIES TO:
Last updated May 6, 2026
Contents
When your organization changes email domains (for example, janeway@old-company.com becomes janeway@new-company.com), PaperCut Hive/Pocket does not currently support automatically updating or renaming existing user accounts to reflect the new domain.
A backend token is tied to the original email/domain, so accounts must be re-created.
Instead, you’ll need to:
- Create new admin and user accounts under the new domain using invitations.
- Uninstall and reinstall the Hive/Pocket clients/apps on users’ devices, and link them to their new accounts.
- Optionally, remove the old accounts in Hive/Pocket once everything has been confirmed as working correctly.
Step 1 – Update administrator accounts
- Sign in to the Hive/Pocket admin portal using an existing admin account on the old domain (for example,
janeway@old-company.com). - Go to Settings:
- From the admin landing page, click the down arrow next to your email in the top-right corner
- Click Settings
- In the Administrators section, click Invite admin
- Enter the new-domain admin email (for example,
janeway@new-company.com) and send the invite - From the new-domain mailbox, open the invite and complete the sign-up process
- Log in and out of the admin portal a couple of times with the new admin account to confirm full access.
Optional: Remove old admin accounts
To remove the old account once the new admin account is confirmed working:
- While logged in as the new admin (for example,
janeway@new-company.com), go back to Settings → Administrators - Click the three dots next to the old admin account (for example,
janeway@old-company.com) and choose Remove
Step 2 – Create user accounts for the new domain
As a Hive admin on the new domain:
- Go to the Users section in the Hive admin portal.
- Invite users at their new email address:
- Send individual invites, or
- Use the Multiple emails tab to paste a list of new email addresses, or
- If you use Azure AD or Google Workspace, configure/import users via the Add-ons page, or
- Use the Bulk Import CSV
For more details on adding users, log in to your Hive/Pocket admin portal, go to the Users tab, and click the + Add Users button.
Step 3 – Changes on users’ devices
Each user with a new-domain account should:
Open the invite sent to their new email address (for example, picard@new-company.com) and complete the sign-up process and client linking as if they were a new user.
- On their Windows/macOS computer:
- Uninstall the existing Hive/Pocket Edge Node & Hive/Pocket Print Client
- Follow the new invite to install and link the client to the new-domain account
- If they use the Android/iOS app:
- Uninstall the existing app
- Reinstall it and link it using the QR code or link from the new invite
- If they use Chromebooks:
- Remove the Hive/Pocket extension from “Force installation” in Google Workspace
- Refresh device policies so the extension is removed
- Re-add the extension to “Force installation”
- Refresh device policies again so the extension is installed
- Use the “Get Started” email for the new-domain account to link the extension
- If the user isn’t seeing jobs with their new email address, the extension may be still linked to their old email. In this case, clear the Chrome extension storage to refresh the connection.
- Steps to clear the Chrome extension storage:
- In Chrome, go to
chrome://extensions - Turn on Developer mode (top-right toggle)
- Find the PaperCut Hive/Pocket extension and click Service worker (under Inspect views)
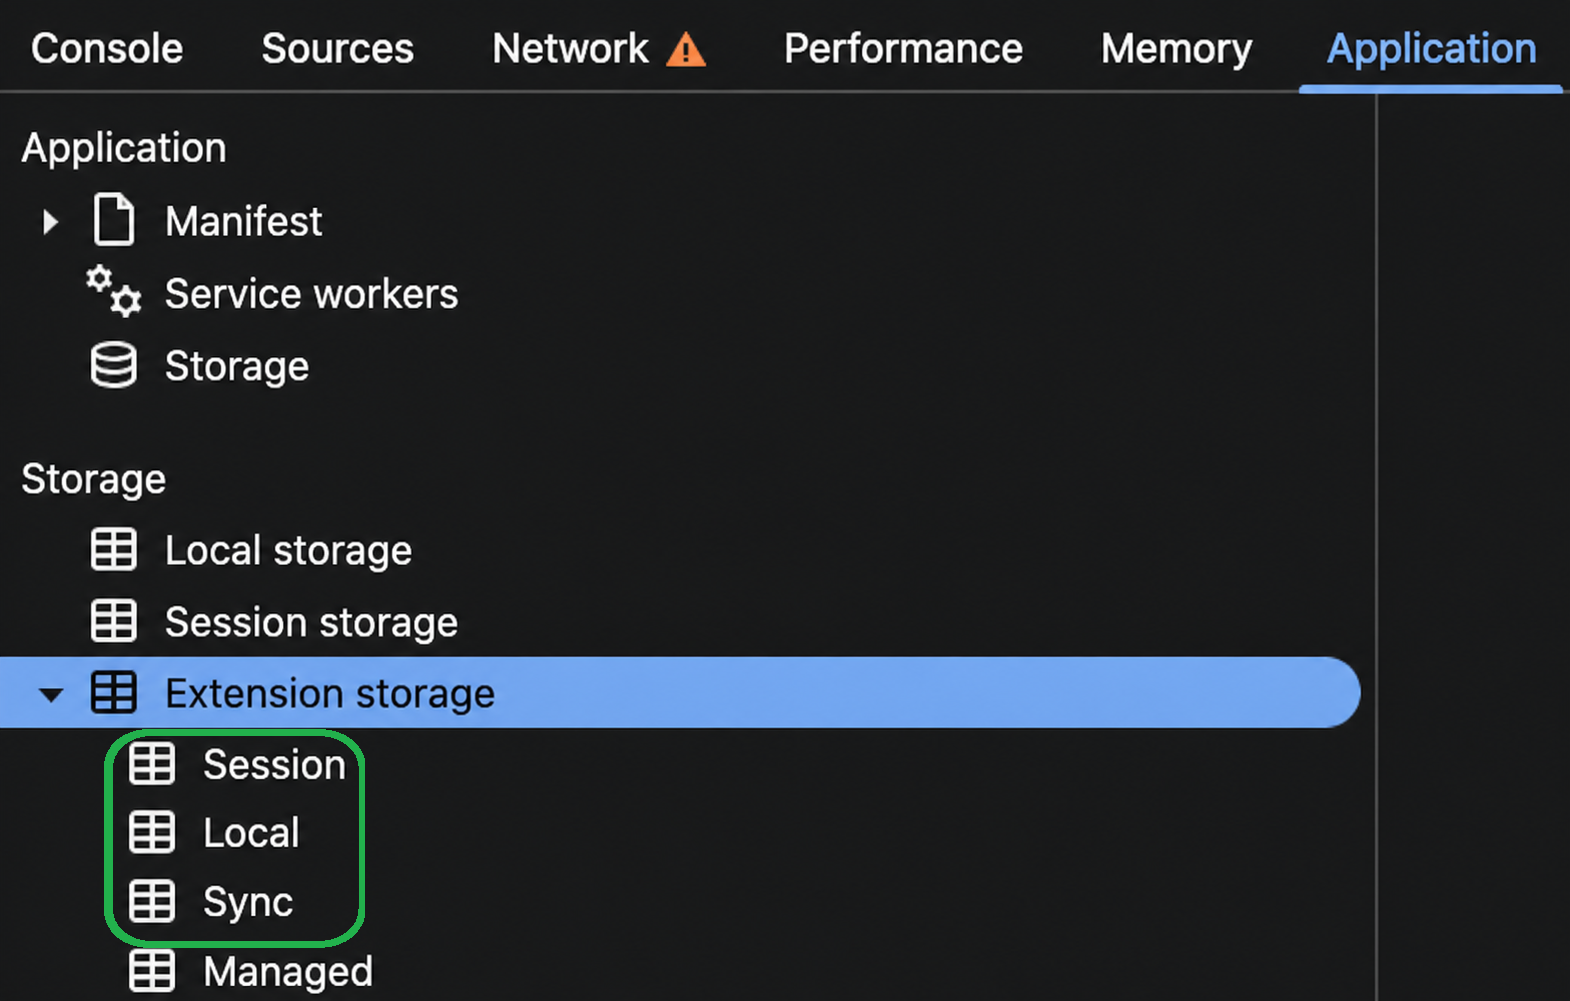
- In the DevTools window that opens, go to the Application tab
- Under Extension Storage, right-click and Clear the following:
- Session
- Local
- Sync
- Close DevTools and Chrome, then reopen Chrome
- Send a fresh invite email to the user and ask them to go through the linking steps again
- Ask new users to submit and release a print job
- In Chrome, go to
Step 4 – Testing
Before cleaning up old accounts:
- Have the ’new’ users print/release a job
- In the admin portal, confirm that jobs appear in the Job Log under the new email addresses
Step 5 – Clean up old accounts
Once you’ve confirmed everything works with the new domain:
- In the admin portal, go to Users
- For each old-domain user account, click the three dots and choose Remove. There is currently no bulk delete, so this is a manual, per-user action
Removing old accounts:
- Does not delete or change historical job data
- Leaves historical jobs and activity logs associated with the old email/ID
Category: PaperCut Pocket and Hive Articles
Subcategory: User Management, Administration
Comments