
Contents
Test XMLRPC using Postman
THE PAGE APPLIES TO:
Last updated September 29, 2025
Contents
“Help! I’m a Systems Administrator trying to test PaperCut MF’s XML Web Services API using Postman, and I’ve got questions. Is the API even running? What methods can I call? How do I send requests without face-planting into cryptic errors?”
If that sounds familiar, you’re in the right place.
This guide is your step-by-step launchpad for exploring PaperCut MF’s XML-RPC API using Postman. Whether you’re automating user balance updates, building a third-party integration, or just curious about what’s under the hood, Postman is the perfect way to experiment safely before you plug your code into a live system.
We’ll walk through everything from generating an API token and setting up your dev environment to making your first calls and troubleshooting the common pitfalls.
Let’s get that API talking.
1. Enable and secure the Web Services API
Follow these steps to create an auth token:
-
Sign in to the PaperCut NG/MF admin interface: http://<your-server>:9191/IT admin
-
Navigate to Options › Config Editor (Advanced).
-
Search for
auth.webservices.auth-token. -
Enter a strong value, for example, MyStrongToken2025.

-
Click Update to save.
You’ll send this token as the first parameter on every XML‑RPC call. (It replaces the admin password.)
2. Allow your workstation’s IP
-
Still under Options › Advanced, scroll to the Security section.
-
Locate Allowed XML Web Services Callers.
-
Add your IP, for example,
192.168.1.123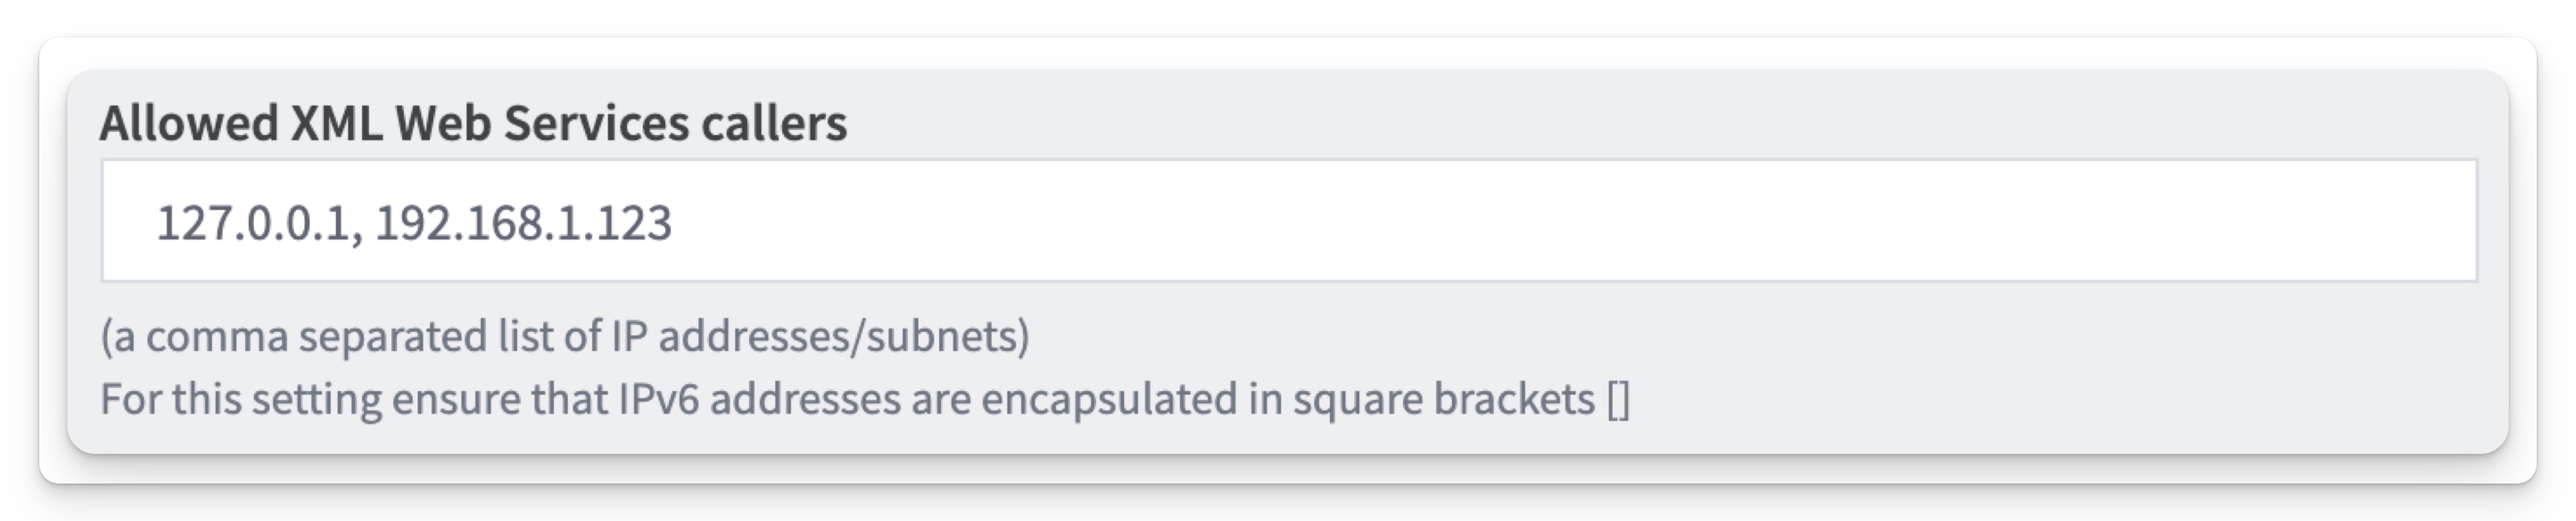
For quick lab work, you can use the catch‑all
ALL_PRIVATE_IP_RANGES, but never in production. -
Click Apply.
3. Set up Postman
-
Enter the PaperCut application server’s IP or Hostname and port, followed by
/rpc/api/xmlrpc
-
Within the Headers tab, add a new header row with the same key (
Content-Type) and your preferred value, such as application/JSON, text/XML, etc.
-
In the Body tab, select the raw option.

In summary, these are the values we are using in Postman.
Setting Value Method POST URL http://<your-server>:9191/rpc/api/xmlrpc
Use https:// and port 9192 if SSL is enabled.Header Content-Type: text/xml Body raw > XML (text/xml)
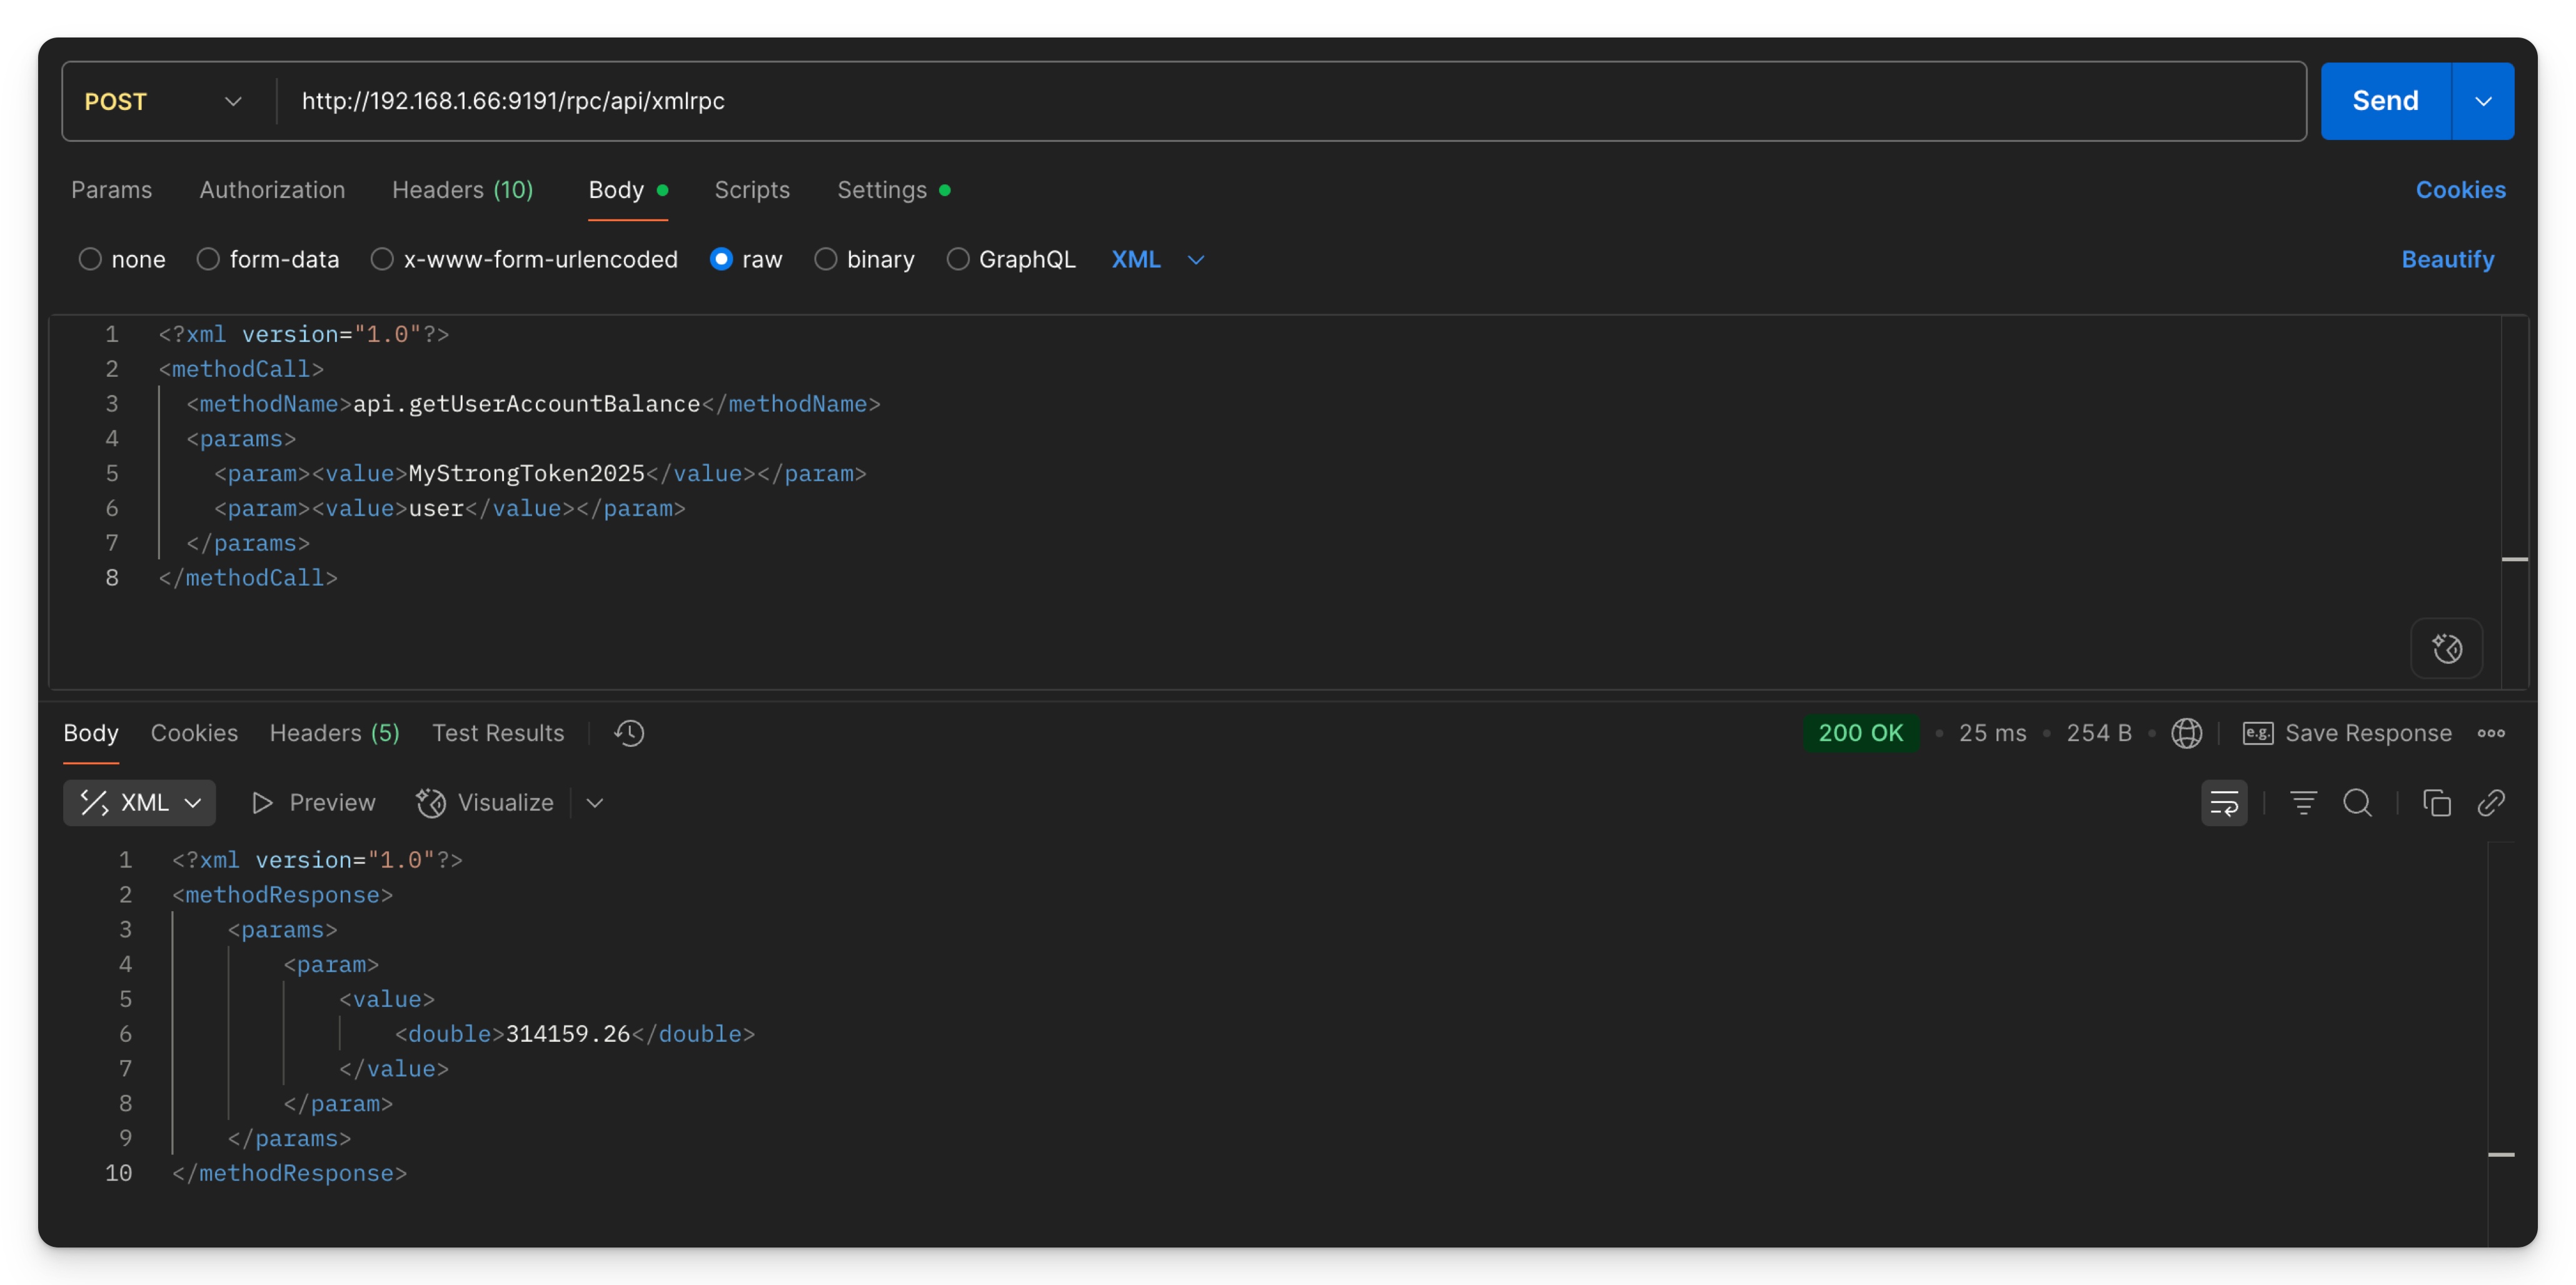
4. Perform a sample request: get a user’s balance
<?xml version="1.0"?>
<methodCall>
  <methodName>api.getUserAccountBalance</methodName>
  <params>
    <param><value>MyStrongToken2025</value></param>
    <param><value>user</value></param>
  </params>
</methodCall>
First, try something like system.listMethods or api.getUserAccountBalance to prove connectivity.
5. Send and admire the response
Press Send, and you should see something like:
<?xml version="1.0"?>
<methodResponse>
    <params>
        <param>
            <value>
                <double>314159.26</double>
            </value>
        </param>
    </params>
</methodResponse>
Boom! User’s balance is displayed.
Troubleshooting cheatsheet
| Symptom | Likely culprit |
|---|---|
| 403 Forbidden | Your IP isn’t in Allowed XML Web Services Callers |
| Auth failed | First parameter ≠ your token (or token typo) |
| NoSuchMethodException | Wrong method name or parameter count (case‑sensitive) |
| Connection error | Port 9191/9192 blocked or server offline |
| 415 Unsupported Media Type | Header isn’t Content-Type: text/xml |
Check server/logs/app.log for chapter‑and‑verse details when things go sideways.
Level‑up with Postman Environments
Stop copying and pasting; let variables do the heavy lifting.
| Variable | Example value |
|---|---|
| pc_token | MyStrongToken2025 |
| pc_url | http://192.168.1.66:9191/rpc/api/xmlrpc |
Now reference {{pc_token}} and {{pc_url}} in your requests for instant portability.

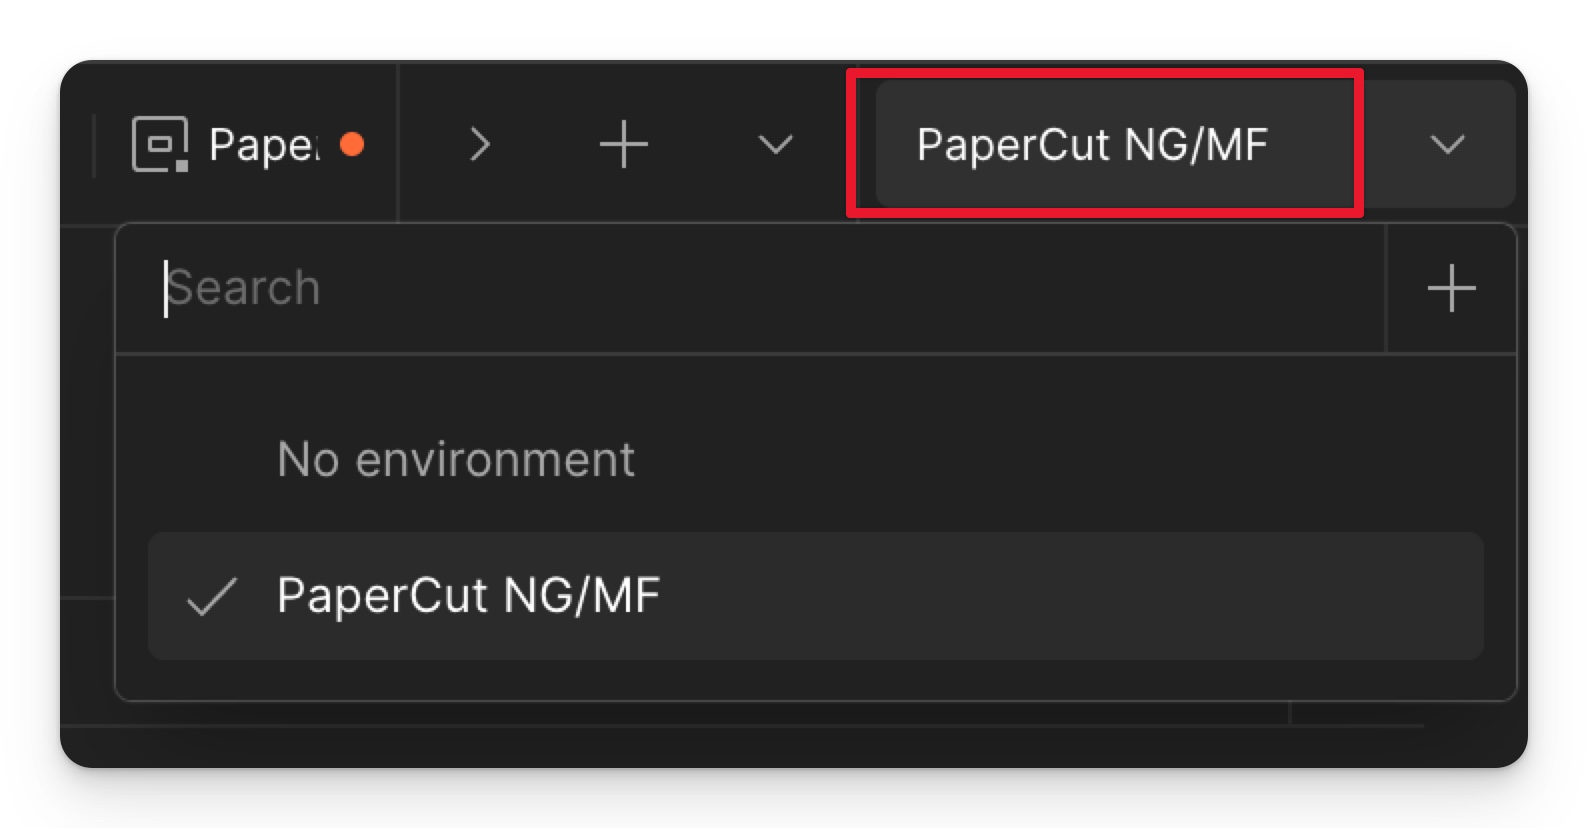
In the dropdown menu in the top right corner of Postman, ensure that you have selected the environment in which the variables were created.

Replace the plain text token with the variable, surrounded with curly braces.
<?xml version="1.0"?>
<methodCall>
  <methodName>api.getUserAccountBalance</methodName>
  <params>
    <param><value>{{pc_token}}</value></param>
    <param><value>user</value></param>
  </params>
</methodCall>
Next, why not try another query…
api.getUserPropertyapi.setUserProperty- or one of the other available queries listed here: https://www.papercut.com/help/manuals/ng-mf/common/tools-web-services/
That’s it, you’ve built a Postman‑powered PaperCut playground. Go forth and script confidently!
And remember: lock down those IP ranges before pushing to prod.
Category: How-to Articles
Subcategory: Scripting and APIs
Comments