
Contents
Manually Generating and Installing iOS AirPrint Profiles for Mobility Print (When Auto Setup Fails)
THE PAGE APPLIES TO:
Last updated December 23, 2025
Contents
Summary
This article provides step-by-step guidance on manually creating and deploying an iOS AirPrint profile for use with PaperCut Mobility Print, as a workaround when automatic iOS profile generation fails due to restricted network environments and your user devices are not managed by MDM software.
(If you are looking for steps to push Mobility Print Queues to iOS/iPadOS devices using Intune, please refer to this article here .)
Background
Using the known host discovery method, Mobility Print typically generates iOS profiles dynamically via cloud-hosted services. In environments with strict firewalls or proxies, these dynamic endpoints may be blocked, preventing users from downloading the profile. This guide walks through manually creating and distributing a .mobileconfig profile using Apple Configurator..
Required Firewall Access (Optional but Recommended)
To enable automatic iOS profile generation and client installer downloads, ensure the following URLs are whitelisted to the Mobility Print Server:
For auto-updating and iOS profile creation:
- https://mobility-print.papercut.com/ *
- https://storage.googleapis.com/pc-mobility-print.appspot.com/ *
For client setup file downloads:
- https://www.papercut.com/api/product/mobility-print/latest/client/windows
- https://www.papercut.com/api/product/mobility-print/latest/client/macos
- https://www.papercut.com/api/product/mobility-print/latest/client/android
- https://ios-profile-signing-dot-pc-mobility-print.appspot.com/sign-profile/v1
Note: Some URLs are hosted on CDNs (e.g., Amazon CloudFront), which use dynamic IP ranges — whitelisting by IP may not be practical.
Manual Profile Generation Steps
1. Install Apple Configurator
Download from the Mac App Store . (Get the Mac App version)
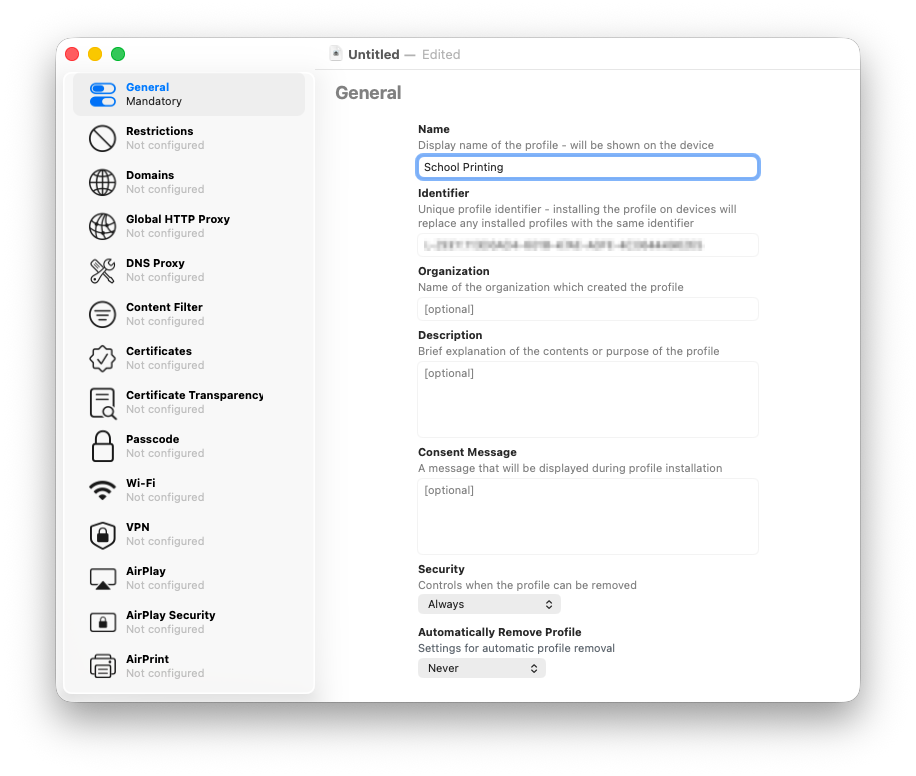
2. Create a New Profile
- Open Apple Configurator.
- Go to File > New Profile.
- Under General:
- Set a name like School Printing.
- Leave the Identifier as-is (important for future updates).
3. Configure AirPrint Settings
- Navigate to AirPrint > Configure > +.
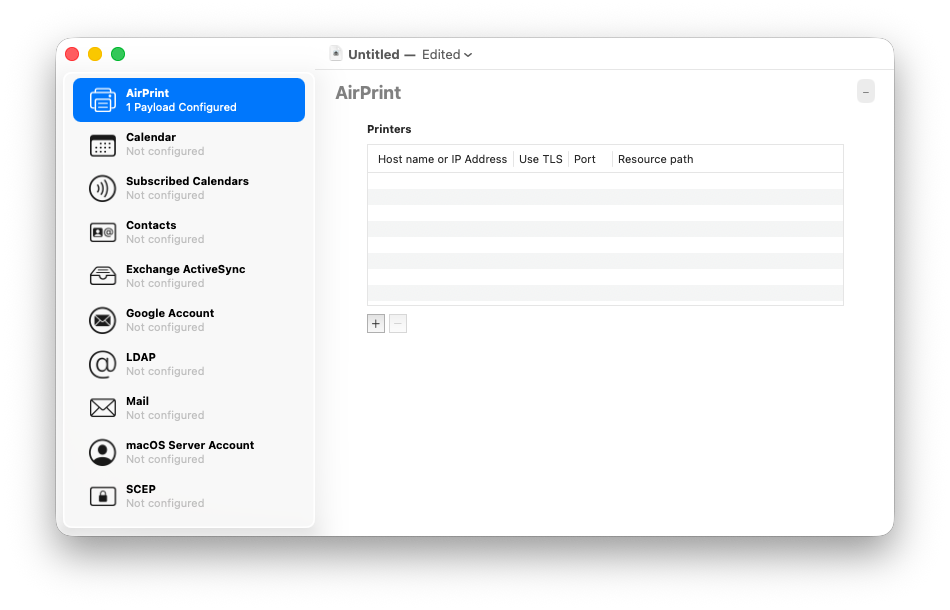
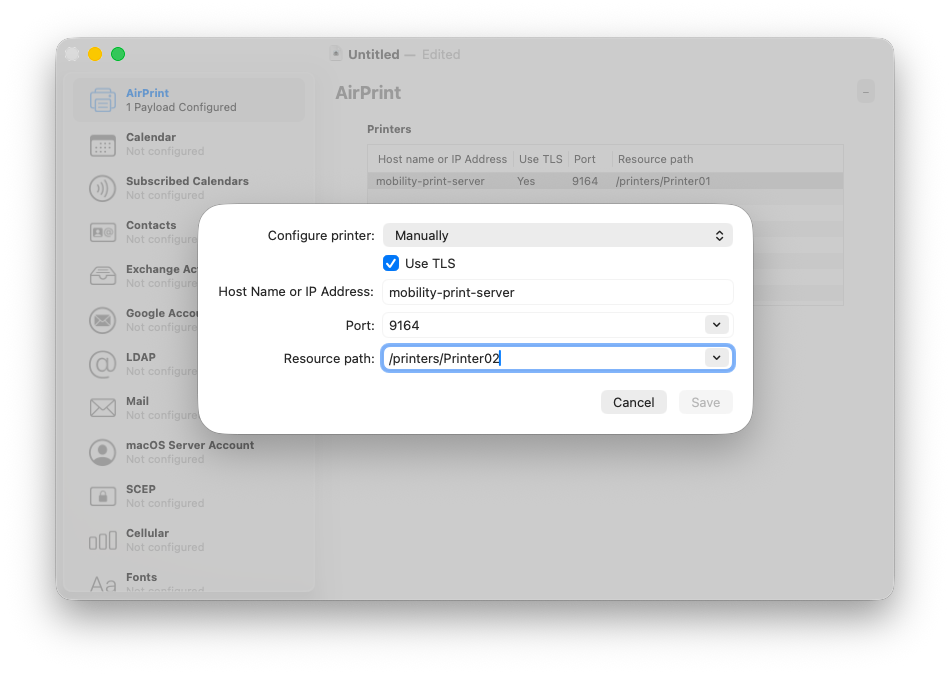
- For each printer:
- Hostname/IP Address: Your Mobility Print server’s IP or hostname.
- Port: 9164
- Resource Path: /printers/<queue_name>
- Enable Use TLS (recommended).
4. Save and Distribute
Save the profile as a .mobileconfig file. Distribute it to test devices via email, file share, or similar methods. Open the file in Safari only on the iOS device connected to the school network.
Installing the Profile on iOS
- Tap Allow when prompted to download the profile.
- Open the Settings app and tap Profile Downloaded at the top.
- Tap Install (twice).
- Tap Done.
- Test printing from Safari or another app.


Once confirmed working, you can share the profile with your users.
If you are using an MDM, please refer to the guide here .
Let Us Know
If you’ve encountered an issue or have feedback on this workaround, please contact PaperCut Support so we can continue improving the experience.
Category: How-to Articles
Subcategory: Mobility Print
Comments