How to turn off PaperCut's Document Processing
Last updated September 30, 2025
“Help! I’m a PaperCut Administrator and I want to disable PaperCut’s Cloud Document Processing features for troubleshooting reasons. How do we fully turn off Document Processing?”
When the PaperCut Document Processing service (either Cloud or Local) can’t be contacted it will result in the error Failed to create a job request for the file scanned in the PaperCut Application log, as seen in the screenshot below.

Generally, this occurs because the PaperCut MF server is unable to reach the cloud service. To troubleshoot you should refer to our article Firewall Ports used by NG & MF and ensure that the appropriate URLs and ports are allow-listed so that the Document Processing service can be reached.
Until that can be done, it may be prudent to turn off settings in PaperCut that will cause scanned documents to be routed through the Document Processing service. This page guides you through disabling those options.
Steps
-
Log into the web interface of your PaperCut server as an administrator.
-
Navigate to Devices, then Scan Actions.
-
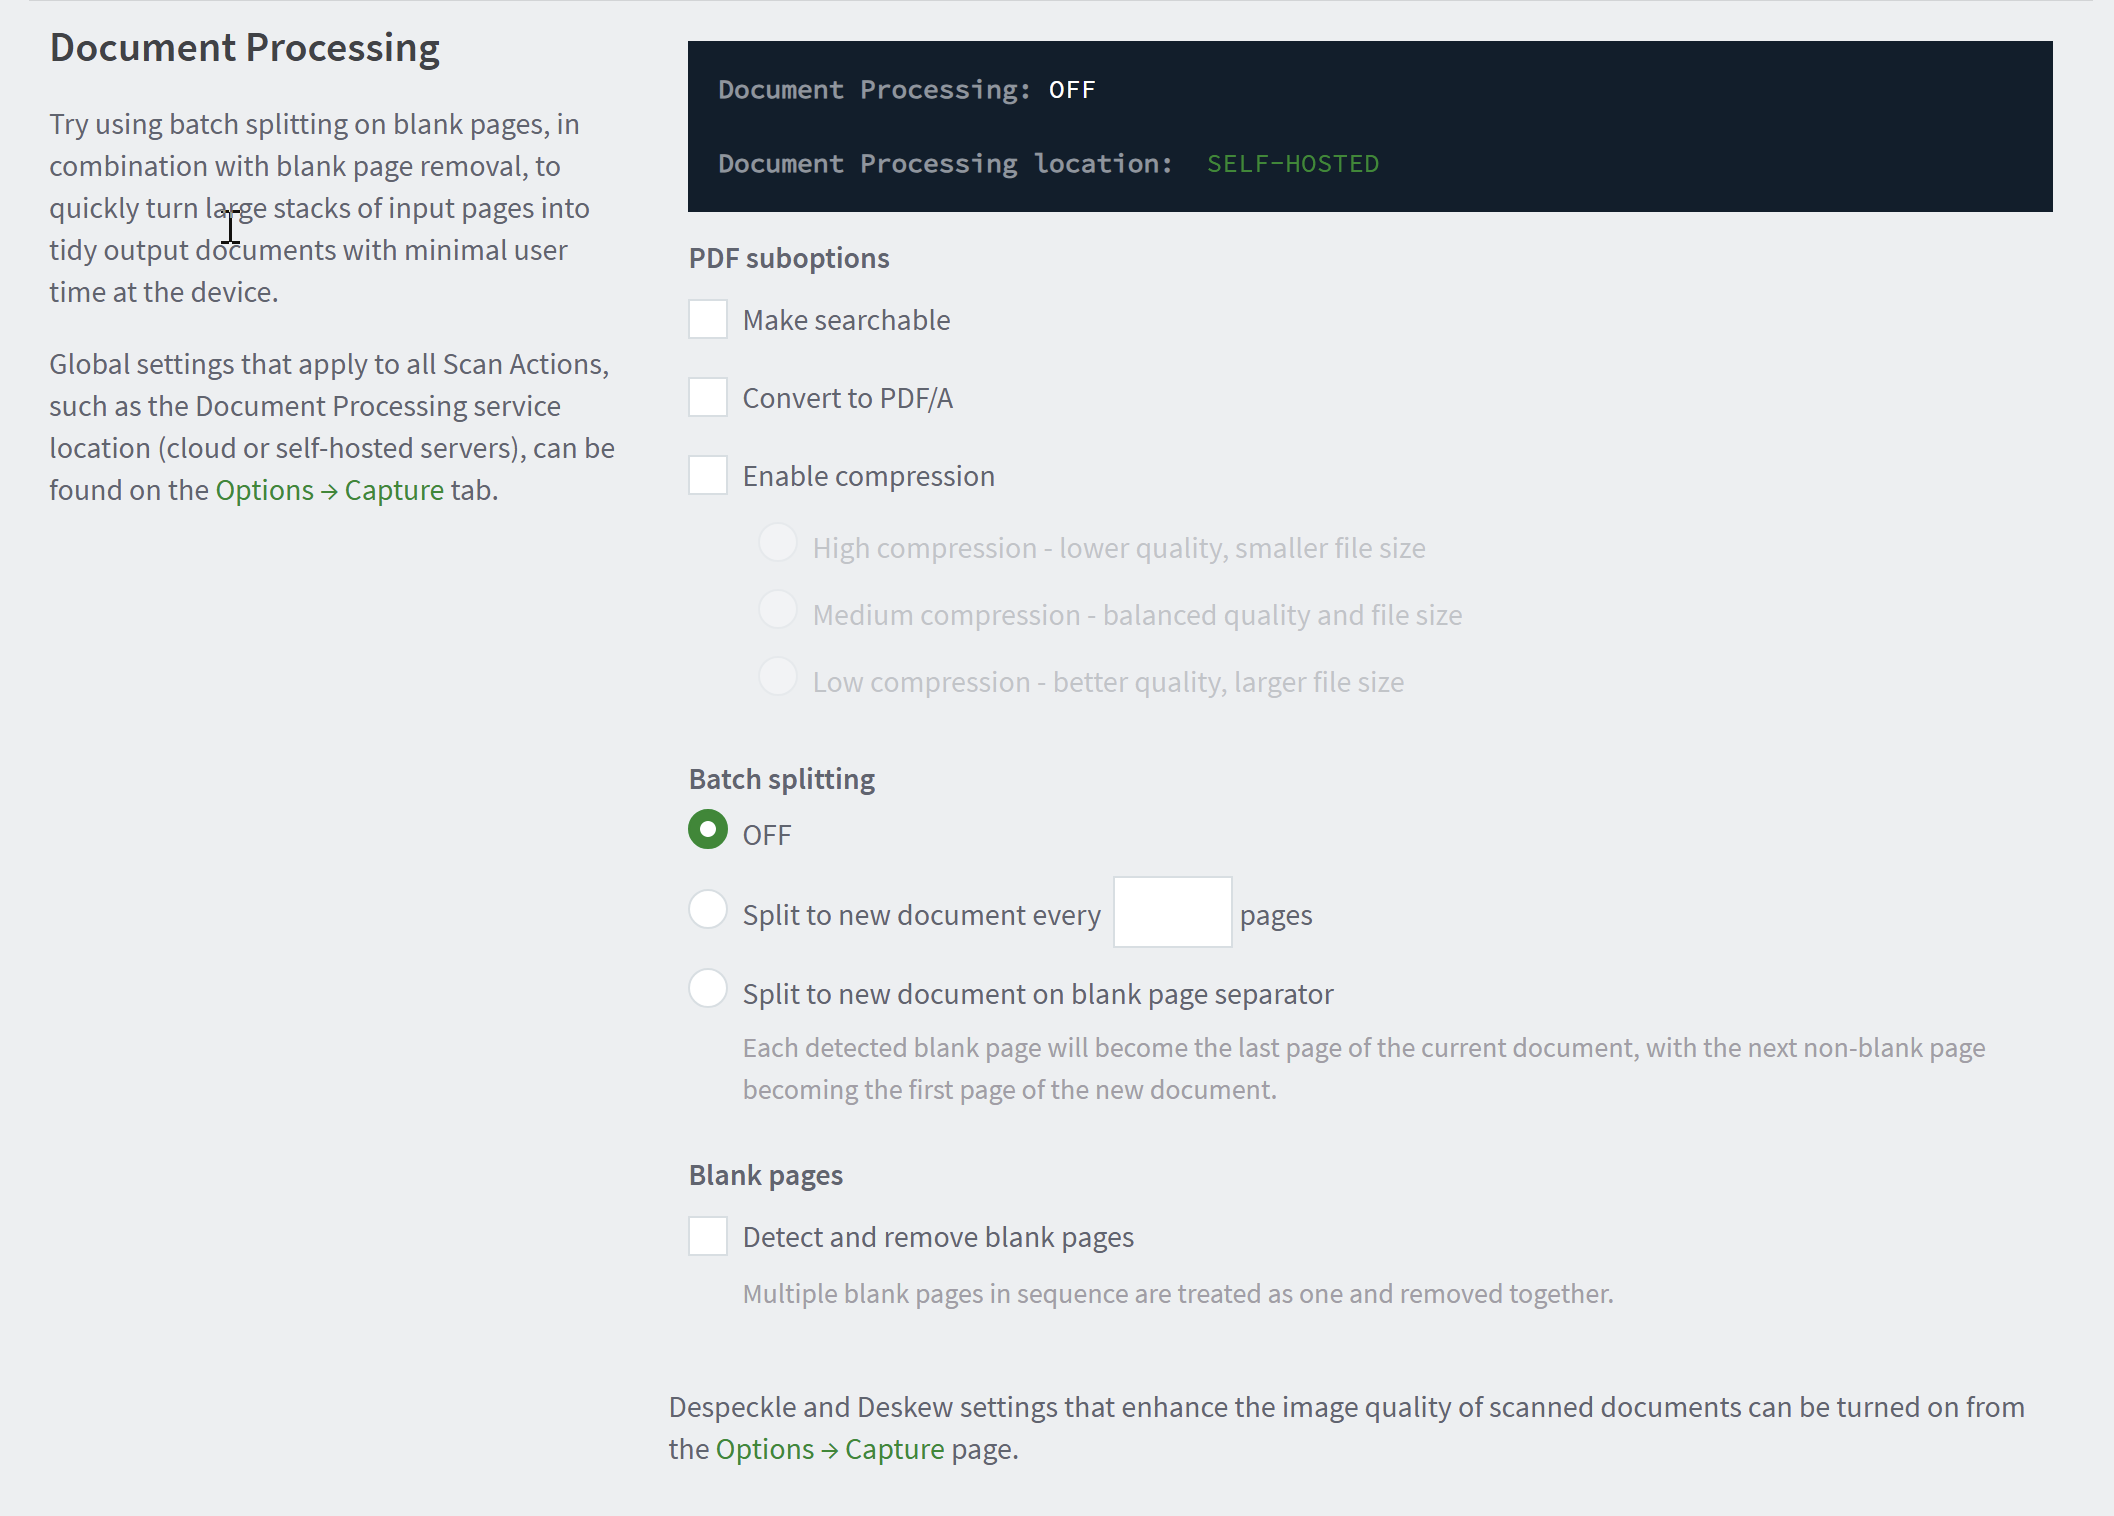
Under Document Processing, disable all the options including…
- Make searchable
- Convert to PDF/A
- Enable compression
- Batch splitting
- Blank pages

-
Then navigate to Options, then Capture.
-
Disable the options “Despeckle…” and “Deskew…"

-
At this point, these changes should be immediate. No server or device restart is needed. Attempt to perform another scan job and see if the scan is now successful.
Still have questions?
Let us know! We love chatting about what’s going on under the hood. Feel free to leave a comment below or visit our Support Portal for further assistance.
Category: How-to Articles
Subcategory: Integrated Scanning
Keywords: mf-only


Comments