
Alongside Windows devices, Microsoft Intune also allows you to manage and deploy software to macOS devices.
This article explains how to use Microsoft Intune to deploy the PaperCut Hive or PaperCut Pocket client software to managed macOS devices.
Summary of deploying with Microsoft Intune
This is a summary of the process. Details are provided below.
- Get and store the PaperCut Hive or Pocket client software as a .zip file.
- Create a shell script and use Microsoft Intune to deploy the .zip file to macOS computers.
- Modify an installation script to include your PaperCut Hive tenancy information.
Microsoft Intune downloads and extracts the .zip file to/var/tmp/and runs the script on macOS computers.
Prerequisites
- Microsoft Intune.
- You need to be a Microsoft Intune administrator (or have relevant permissions).
- macOS 12.0 or later devices managed by Microsoft Intune.
- macOS devices must be enrolled and set up for Microsoft Intune management.
- Cloud storage, to host the PaperCut Hive or PaperCut Pocket installation zip file.
- Rosetta 2 is required to run the PaperCut Pocket or PaperCut Hive client software on Apple Silicon Macs. To install Rosetta 2 on Apple Silicon Macs automatically, you can deploy a shell script in Intune. To view a sample script, see Rosetta 2 Installation Script .
Deploying the PaperCut Hive or Pocket client software to end-user devices
You need to download the macOS PaperCut Hive or PaperCut Pocket client software ZIP and upload it to your preferred cloud storage location, then create a Microsoft Intune shell script to deploy it.
1. Store the PaperCut Hive or Pocket computer app to your preferred cloud storage location.
You need to download the PaperCut Pocket or PaperCut Hive client software files from the Jamf Pro Add-on.
In the PaperCut Hive or Pocket admin console, in the left menu, select Add-ons.
On the Device management tab, locate the Jamf Pro card and click Learn More.

Click Add.
 The Review authorizations popup is displayed.
Read the points, select the I agree that: checkbox and select Agree to enable this add-on for your organization
Click the Setup instructions tab.

Click the Download zip file button to download the PaperCut Hive or Pocket client software zip file to your computer.
Upload the papercut-hive.zip or papercut-pocket.zip file to your preferred cloud storage. Take a copy of the download URL. Note, this URL should provide a direct download of the installer zip.
Close the Jamf Pro add-on instructions window.
In the PaperCut Hive admin console, go to Manage > Edge Mesh and click Add edge nodes.
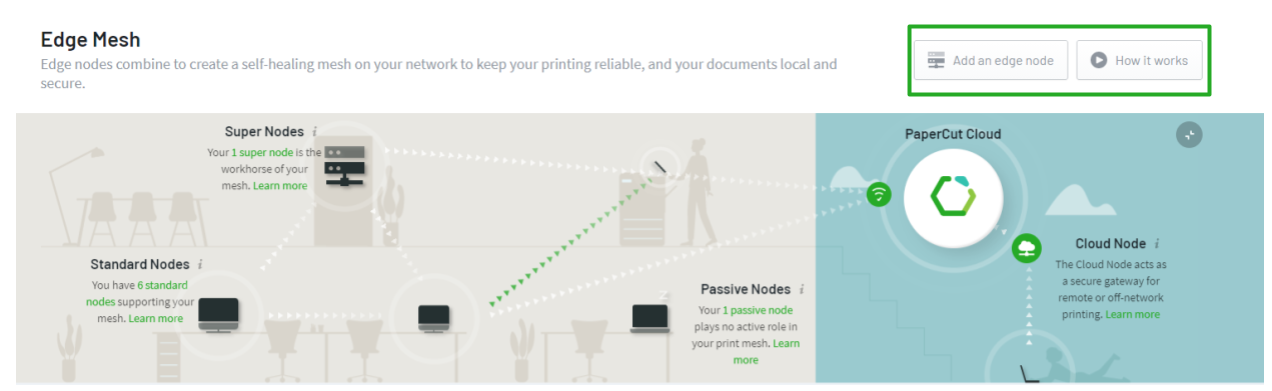
PaperCut Pocket/PaperCut Hive admin interface - Add an edge node
Select Manually deploy edge nodes.
Under Step 2, click the Copy button to copy the command line and paste it into a text editor. You'll need the
/systemkeyvalue later.
2. Create a shell script in the Intune admin console
To deploy the PaperCut Hive or Pocket client software to managed-macOS devices requires you use a shell script. https://learn.microsoft.com/en-us/mem/intune/apps/macos-shell-scripts
Copy the below script relevant to your product, and save this as a
.shfile on your computer.PaperCut Hive
#!/usr/bin/env zsh

# Download the PaperCut Hive installer zip file from your chosen cloud storage location.
cd /var/tmp
curl "https://your-cloud-storage-location/temp/papercut-hive.zip" -O -J -L
unzip papercut-hive.zip

# Create a variable specifying the unzip location (default: var/tmp)
HIVE_INSTALLER_PATH="/var/tmp/hive_installer"

# Get the current logged in user excluding loginwindow, _mbsetupuser, and root
current_user=$(/usr/sbin/scutil <<<"show State:/Users/ConsoleUser" |
/usr/bin/awk '/Name :/ && ! /loginwindow/ && ! /root/ && ! /_mbsetupuser/ { print $3 }' |
/usr/bin/awk -F '@' '{print $1}')

# Make sure that we can find the most recent logged-in user
if [[ $current_user == "" ]]; then
# Because someone other than the current user was returned, we are going to look at
# who uses this Mac the most, then set the current user to that user.
current_user=$(/usr/sbin/ac -p | /usr/bin/sort -nk 2 |
/usr/bin/grep -E -v "total|admin|root|mbsetup|adobe" | /usr/bin/tail -1 |
/usr/bin/xargs | /usr/bin/cut -d " " -f1)
fi

# Install the PaperCut Hive software with system administrator privileges
# This code is private to your PaperCut organisation. Please do not share it
# Replace 'yy' with the regional data centre region code e.g. au,us,eu,uk
# Replace 'zz' with the OrgID
cd ${HIVE_INSTALLER_PATH}
./install.sh xxxxxxxxxxxxxxxxxxxxxxxxxxxxxxxxxxxxxxxxxxxxxxxxxxxxxxxxxxxxxxxxxxxxxxxxxxxxxxxxxxxxxxxxxxxxxxxxxxxx yy zz

# Install the PaperCut client as the current user
/usr/sbin/chown -R $current_user ${HIVE_INSTALLER_PATH}
/usr/bin/su - "$current_user" -c "cd ${HIVE_INSTALLER_PATH} && ./install.sh install_client"

# Remote installation files
rm -d -r /var/tmp/hive_installer
sudo rm /var/tmp/papercut-hive.zip
PaperCut Pocket
#!/usr/bin/env zsh

# Download the PaperCut Pocket installer zip file from your chosen cloud storage location.
cd /var/tmp
curl "https://your-cloud-storage-location/temp/papercut-pocket.zip" -O -J -L
unzip papercut-pocket.zip

# Create a variable specifying the unzip location (default: var/tmp)
POCKET_INSTALLER_PATH="/var/tmp/pocket_installer"

# Get the current logged in user excluding loginwindow, _mbsetupuser, and root
current_user=$(/usr/sbin/scutil <<<"show State:/Users/ConsoleUser" |
/usr/bin/awk '/Name :/ && ! /loginwindow/ && ! /root/ && ! /_mbsetupuser/ { print $3 }' |
/usr/bin/awk -F '@' '{print $1}')

# Make sure that we can find the most recent logged-in user
if [[ $current_user == "" ]]; then
# Because someone other than the current user was returned, we are going to look at
# who uses this Mac the most, then set the current user to that user.
current_user=$(/usr/sbin/ac -p | /usr/bin/sort -nk 2 |
/usr/bin/grep -E -v "total|admin|root|mbsetup|adobe" | /usr/bin/tail -1 |
/usr/bin/xargs | /usr/bin/cut -d " " -f1)
fi

# Install the PaperCut Pocket software with system administrator privileges
# This code is private to your PaperCut organisation. Please do not share it
# Replace 'yy' with the regional data centre region code e.g. au,us,eu,uk
# Replace 'zz' with the OrgID
cd ${POCKET_INSTALLER_PATH}
./install.sh xxxxxxxxxxxxxxxxxxxxxxxxxxxxxxxxxxxxxxxxxxxxxxxxxxxxxxxxxxxxxxxxxxxxxxxxxxxxxxxxxxxxxxxxxxxxxxxxxxxx yy zz

# Install the PaperCut client as the current user
/usr/sbin/chown -R $current_user ${POCKET_INSTALLER_PATH}
/usr/bin/su - "$current_user" -c "cd ${POCKET_INSTALLER_PATH} && ./install.sh install_client"

# Remote installation files
rm -d -r /var/tmp/pocket_installer
sudo rm /var/tmp/papercut-pocket.zip
Update the script with the identity of your PaperCut Hive or Pocket tenancy.
Update the download URL,
https://your-cloud-storage-location/temp/papercut-hive.ziporhttps://your-cloud-storage-location/temp/papercut-pocket.zip, to point to your cloud storage location.Replace
xxxxxxxxxxxxxxxxxxxxxxxxxxxxxxxxxxxxxxxxxxxxxxxxxxwith the value of your organization's/systemkeyyou noted down earlier.Replace
yywith the regional hosting location of your tenancy. For example,au,us,uk,eu.
Sign in to your Intune admin interface, for example, https://intune.microsoft.com.
In the left menu, select Devices.
In the sub-menu, select macOS.
From the left-hand menu, select Shell scripts
Select Add.
Enter a name for your script. For example, PaperCut Hive Client Software Deployment.
Upload the
.shscript we created in step 1.Set Run script as signed-in user to No.
Set Hide script notifications on devices to Yes.
Leave Script frequency as Not configured.
Set Max number of times to retry if script fails to 1 time.
Under the Assignments section, apply your selection of groups or users for which this script should apply.
Review your configuration and save the script.
3. Confirm successful execution of the script
Alongside the logging available in the Intune admin interface, which shows the script's successful execution, manually check three areas on a sample workstation.
In the PaperCut Hive or Pocket admin console, confirm that the device is listed in the Edge Mesh tab and is showing as online.
Open System Settings > Printers & Scanners (for macOS 13 Ventura or newer) or System Preferences > Printers & Scanners (for macOS 12 Monterey or earlier). Confirm that the PaperCut Printer is displayed.
Open the PaperCut Hive or Pocket invite email for the user and click the link in that email. This causes the PaperCut Hive or Pocket print client on that macOS device to be linked to that user.
Send a test print job and validate it in your PaperCut Hive or Pocket admin console. Go to the Job Log, find the job, and see if it's linked to the correct user.
Post-deployment checks
Spot-check a few macOS computers to ensure the following:
- In Activity Monitor, check the
pc-edgenode-serviceprocess is running.
The computer requires this service to perform Edge Mesh activities such as receiving, replicating, or printing jobs if the PaperCut Cloud Service calls upon it. - In Activity Monitor, check that
pc-print-clientprocess is running.
This is the print client needed to link the end-user to PaperCut Pocket or PaperCut Hive and submit jobs via the PaperCut Printer. This process must be running in memory. It provides the functions the user needs to print jobs via the PaperCut Printer.
If either of these are not running, please get in touch with your PaperCut reseller and provide copies of the logs.
Location of logs
-
edge node logs — The Setup Log for the edge node service:
/Library/PaperCut Hive/data/logsor/Library/PaperCut Pocket/data/logsdirectoryEdge node Setup Log: “Setup Log %date% 00X.txt”
-
print client logs —- The print client logs are located in the:
~/Library/PaperCut Hive/data/logsor~/Library/PaperCut Pocket/data/logsdirectory
Note: For macOS, since the print client is installed under the user context, so you’ll need to perform either of the below steps to grab the set of logs:
- Open Finder.
- Hold down the Option key when clicking the Go menu. The library will appear below the current user’s home directory
Or
- Open Finder.
- Click on the Go menu and choose Go to Folder.
- In the popup, type ~/Library and press Enter.
Comments